M.O.R.E. Dual Battery Tray Installation Write-Up w/ODYSSEY Batteries (2007-11 JK)

wayoflife

Administrator
Staff member
main.php


When you start building up your Jeep to include a winch, auxillary lights, a refridgerator or even welder, you'll want more than just a great Deep Cycle battery like an ODYSSEY Extreme to keep them all humming along. Sometimes, what you really need are two and in order to do that in a 2007-11 Jeep JK Wrangler, you'll need to install a dual battery tray much like this one made by Mountain Off Road Enterprises or M.O.R.E. for short. In this write-up, you 'll get to see just how easy it is to get one installed in your Jeep.

As far as batteries go, we chose to run two 34-PC1500T ODYSSEY Extreme Batteries because there really isn't anything out there that can even come close to their performance. Sure, they cost more than an Optima Yellow Top but in my opinion, those aren't even in the same league. For more information regarding Odyssey Extreme Series Batteries, click on the following link:
http://www.odysseybattery.com/batteries.html

To find an Odyssey dealer near you, click on the link below to see their Dealer Locator:
http://www.odysseybattery.com/locator.html

Please note that some of the photos were borrowed from other past write-ups to help explain things more thoroughly. Needless to say, you may see things that look out of place or have previously been replaced.

What you will get with Your Kit
Here's a shot of everything you'll get with your new M.O.R.E. Dual Battery Tray kit.
main.php


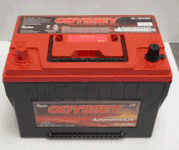
And, this is a shot of the two 34-PC1500T ODYSSEY Extreme Batteries we will be running.
main.php


1– DUAL BATTERY TRAY
1– POWER DISTRIBUTION/PCM BRACKET
1– BATTERY HOLD DOWN BRACKET
3– 5/16-18x1 BOLT
5– 5/16” FLAT WASHER
3– 5/16” LOCK WASHER
2– 5/16-18 LOCK NUTS
2– 5/16 “J” BOLT

What you will need
• 10mm Wrench/Socket
• 1/2" Wrench/Socket
• Flathead Screwdriver
• Needle Nose Pliers
• Hacksaw

Installation Instructions
1. Using a flat head screwdriver, loosen the hose clamp securing the air tube to the air cleaner box.
main.php


2. Grab the CCV hose firmly and pull it off the air cleaner box.
main.php


3. Grab the air cleaner box and pull it up and out of the engine compartment.
main.php


4. Use a 10mm socket to remove the bolt securing the power steering reservoir in place. Move reservoir out of the way.
main.php


5. Use a 10mm wrench to disconnect the battery leads.
main.php


6. Use a 10mm wrench to disconnect the ground wire attached to the side of the body as shown.
main.php


7. Unlock and unplug the wiring harness coupler next to the battery.
main.php


8. Unlock and unplug the wiring harness from the purge control valve.
main.php


9. Unlock and unplug the large wiring harness coupler sitting between the battery and TIPM.
main.php


10. Use a flathead screwdriver to free the tabs securing the TIPM onto its mount as shown.
main.php


11. Carefully lift the TIPM up off its mount.
main.php


12. Unlock and unplug all the wiring harness connectors attached to the TIPM.
main.php


main.php


main.php


main.php


main.php


main.php


main.php


13. Set aside the TIPM and then, using a 10mm socket attached to a long ratchet extension, remove the clamp securing your battery in place.
main.php


14. Remove your battery.
main.php


15. Use a 10mm socket to remove the 4 bolts securing the bottom of your battery tray in place.
main.php


16. Use a 10mm socket to remove the 3 nuts securing the battery tray to the firewall.
main.php


17. Use a 10mm socket to remove the one bolt securing the battery tray to the fender.
main.php


18. Use a 10mm socket to remove the one bolt securing the battery tray to the front of your Jeep.
main.php


19. Use a pair of needle nose pliers to pry the wiring harnesses off battery tray as shown.
main.php


main.php


20. Lift the purge control valve off it's mount.
main.php


21. Remove the battery tray from the engine compartment.
main.php


22. Use a 10mm socket to remove the bolts securing the TIPM mount from the battery tray.
main.php


23. Use a hacksaw to cut off the forward section of the battery tray as shown. The 2nd pic shows what you are removing and will be reusing.
main.php


main.php


24. Install your new M.O.R.E. battery tray into your engine compartment and align the back of it onto the studs on the firewall.
main.php


25. Use the factory nuts to secure the battery tray onto the firewall. Make sure that you do not make the same mistake that you can see I did in this pic and that was to pinch the ground strap behind the tray. You will need to use a 10mm socket for this job.
main.php


26. Use one of the factory bolts to secure the only mounting tab located on the bottom of the tray in place. You will need to use a 10mm socket for this job.
main.php


27. Install the forward portion of the factory battery tray that you cut off back inside your engine compartment.
main.php


28. Loosely secure the reused section of tray in place using the factory hardware.
main.php


29. Install the new TIPM mounting plate provided with the kit over the reused section of the factory tray. Loosely secure it in place using the hardware provided with the kit.
main.php


30. Install the factory TIPM mounting bracket on to the new plate using the factory hardware. Use a 10mm socket to tighten up the bolts.
main.php


31. Install the remaining bolts and tighten them up. A 10mm socket will be needed for the factory hardware and a 1/2" socket will be needed for the new ones.
main.php


main.php


main.php


32. Plug all the wiring harnesses back into the TIPM and lock them in place.
main.php


33. Install the TIPM onto its mounting bracket.
main.php


34. Install the purge control valve onto its new mounting post.
main.php


35. Reconnect the remaining wiring harness plugs back into their respective sockets.
main.php


main.php


main.php


36. Carefully place your new 34-PC1500T ODYSSEY Extreme Batteries into the tray.
main.php


37. Place the hold down bracket on top of the batteries and then secure it in place using the J-hooks, washers and wing nuts provided.
main.php


That's it, you're done!
main.php


For my purposes, I've just hooked mine up in parallel until I can get around to installing a good dual battery switching system.
main.php


And that's it, you now have a two amazing batteries under your hood and can use them from running all kinds of electrical gadgets to using something like a Premier Ready Welder. :cool:
 
Correct me if I'm wrong but, you seem to be plugued in parallel, not in series.

If plugued in series, you would double the voltage and keep the same amps,

If plugued in parallel, you would double the amps and keep the same voltage.

And, if plugued in series, you would be at 24v, which would blow all your electronic modules

:standing wave:

You are correct. My mind was on welding - what you see is everything in parallel :blush:
 
Nice setup and great guide. I have always thought of doing a dual battery setup in my Jeep because of all the extra stuff I have. (4x300W Lights, Rock lights, Winch, Air compressor, etc..) How does the stock alternator feel about a dual battery setup? Do they put strain on the alternator and what would the best way to setup just for extra juice? IE: the winch is probably the most used and most hard on the battery. Should I use a series like you have set up currently or would a toggle work better to switch to a different battery?
 
Great article, I've been debating about going down the the dual battery route. Holy expensive batteries, Batman. Those things are almost $300 a pop!


Man that's a tight fit!

(que that's what she said crowd)

That's what she said.

Don't hate.
 
Thank you for the install instructions. I was planning to install a dual battery tray and wondering how challenging it would be for my somewhat limited mechanic skills.
 
Nice setup and great guide. I have always thought of doing a dual battery setup in my Jeep because of all the extra stuff I have. (4x300W Lights, Rock lights, Winch, Air compressor, etc..) How does the stock alternator feel about a dual battery setup? Do they put strain on the alternator and what would the best way to setup just for extra juice? IE: the winch is probably the most used and most hard on the battery. Should I use a series like you have set up currently or would a toggle work better to switch to a different battery?

We've actually been running this setup for a very long time and only now got around to finishing up a write-up for it. Never had a problem with the alternator or otherwise.

WOL, Do you know if they make this kit for the 2012?

Yes, but it's a little different.

What Sharkey said, they do offer a 2012-up setup but, it is setup a bit differently as shown in the pic he posted up.
 
Great article, I've been debating about going down the the dual battery route. Holy expensive batteries, Batman. Those things are almost $300 a pop!

They ain't cheap but are totally worth it. I had been running Optima Yellow Tops for years and was always frustrated at how quickly they got tapped out and could never be charged back up. Ever since we started running Odyssey's (or the Diehard equivalent), we've never had a problem.

Thank you for the install instructions. I was planning to install a dual battery tray and wondering how challenging it would be for my somewhat limited mechanic skills.

Glad to be of help. It really isn't a hard install at all :)
 
Very cool . Thank you , I have been thinking about this mod. I'm also interested in doing an on board welder.
 
Two questions.
Have you done the isolator wiring yet? I've got a similar setup in my 09 JK but am in the market for new batteries (as you know) and I've been frustrated recently because my starting battery is crapping out, and the isolator that I installed requires me to open the hood in order to self-jump. I was wondering if you had any suggestion on an isolator with a remote switch inside the cab. (lazy, yes.. don't hate!)

And 2nd, I've read a lot about Die Hard Platinum vs Odyssey, are they really the same or are the guts different/batter in the Odyssey branded? (the price diff is $100+!)

Thanks!
 
Great article, I've been debating about going down the the dual battery route. Holy expensive batteries, Batman. Those things are almost $300 a pop!


That's what she said.

Don't hate.

I wonder if it would be a better fit with two yellow tops (or red, or blue etc) rather than a mix and match pair..
 
Two questions.
Have you done the isolator wiring yet? I've got a similar setup in my 09 JK but am in the market for new batteries (as you know) and I've been frustrated recently because my starting battery is crapping out, and the isolator that I installed requires me to open the hood in order to self-jump. I was wondering if you had any suggestion on an isolator with a remote switch inside the cab. (lazy, yes.. don't hate!)

And 2nd, I've read a lot about Die Hard Platinum vs Odyssey, are they really the same or are the guts different/batter in the Odyssey branded? (the price diff is $100+!)

Thanks!

I've been wondering the same thing. :thinking:

Thanks for the great write-up. Been thinking about dual batteries for some time now and this has gotten me motivated.
 
Sorry for not seeing the question above sooner. I have bought a painless wiring kit and had intended to install it but never got around to it due to all the transmission problems we were having. Now that we're doing an LS swap, I'm not even 100% sure we'll be able to keep our dual battery tray - we'll have to see.

Regarding And 2nd, Die Hard Platinum and Odyssey, it is my understanding that the Platnum P-1's are made by Odyssey. I don't know if they are exactly the same in terms of performance though. I have run the P-1's in the past and they are a HUGE improvement over Optima Yellow Tops and I would highly recommend them too.

Thanks, too late =) I also got the painless little black box to do the relay thing...
And I went with dual Odyssey!
Pretty happy so far!!!
 
Nice...

This is the setup I'll be running hopefully starting next week if everything comes in as planned before the weekend.

M.O.R.E_DualBattery.jpg MORE Dual Battery Tray
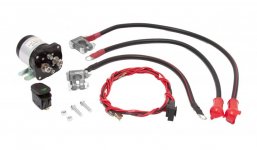
RR_DualIsolatorKit.jpg Rugged Ridge Isolator with a 3 way switch
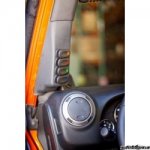
a-pillarpodmd.jpg Pillar Rocker switch Pod Controlling my batteries and Compressor
34-PC1500T.gif X2 34-1500 Batteries
 
Top Bottom