Jeep JK 2007-2011 Spark Plugs and Ignition Wires Write Up

JeepFan

Hooked
Spark Plugs and Wire Set Replacement 2007-2011 Jeep Wrangler JK 3.8L

What You Will Need:

3/8” Drive Ratchet
3/8” Torque Wrench
18” Ratchet Extension
3/8” Swivel Socket
3/8” Drive, 5/8” Spark Plug Socket
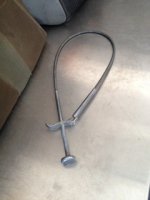
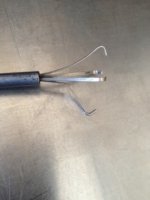
Mechanical Fingers Tool
Spark Plug Gapper (w/ .050 feeler gauge)

What you will need to get for this job:

(6) Champion Spark Plugs 7440 RE14PLP5 $3.99 each at most auto parts stores.
(1) Wire Set (Part#68017712AC) $60.00 dealer price.
(1) Packet of Dielectric Connector Grease. $1.29 at most auto parts stores.
(1) Wire Tray (Part#5149053AB) Optional. $5.00 dealer price. Special order!

Tech guidelines and notes:

Spark plug gap: (.050) Fifty thousandths of an inch.
Spark plug thread torque: 12 FOOT LBS

Champion does not recommend the use of Anti-Seize on the spark plug threads. Champion plugs have a special coating on the thread body that prevents thread seizure in aluminum heads. The use of Anti-Seize will cause the installer to over torque the spark plug in the cylinder head which could damage the threads in the cylinder head itself.

Changing the spark plugs and wires in your Jeep Wrangler’s engine may be necessary if you notice intermittent miss fires at idle when the engine is in gear and stopped. Chrysler recommends replacing the spark plugs and ignition wires at 102,000 miles but, your mileage may vary depending on the level of modifications you’ve performed on your Jeep, climate, and severe driving conditions.
While changing the spark plugs and wires is a relatively easy task, the passenger side wires and plugs can prove to be a challenge. If you have removed the passenger side fender liner, the job will be much easier. Optionally, you might want to have a new wire tray on hand for the passenger side wire assembly as it might break during removal.

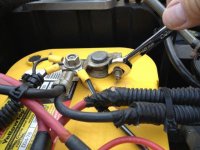
  1. For safety purposes, disconnect the negative battery cable.

    IMG_2150.jpg

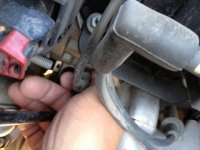
  2. Remove cylinder #2 (drivers side front) spark plug wire. (You may need to twist the boot left and right to break it loose from the coil and spark plug)

    IMG_2151.jpg

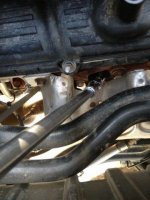
  3. Using the 3/8” ratchet, extension, swivel and 5/8” spark plug socket, carefully remove the driver side front spark plug. (Note: Before removing the spark plug, take care to remove any debris that may have collected from around the base of the spark plug to prevent foreign objects from falling into the cylinder.
    IMG_2164.jpg

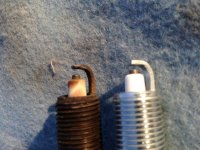
    Here’s an old vs. new comparison of the spark plug. Due to wear and tear, you will notice the gap of the old plug has widened quite a bit compared to the new.
    IMG_2152.jpg

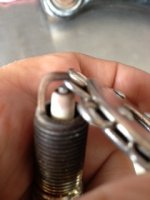
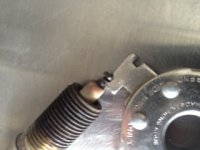
  4. Using the spark plug gapper, find the .050 gauge feeler and carefully place it between the grounding electrode and center electrode. You should feel a slight drag as you slide the feeler between the gap. If adjustment is needed, use the adjustment slot on the gapper to bend the grounding electrode in or out. Use small movements and recheck the gap frequently. (Important: never pry against or bend the center electrode or damage to the spark plug will occur.)
    gap1.jpg gap2.jpg

  5. Insert the spark plug into the 5/8” spark plug socket and carefully lower the spark plug into the threaded hole in the cylinder head. By hand, start turning the socket clockwise to thread the plug into the cylinder head. Use extreme caution while starting the threads; the plug should easily thread into the cylinder head. If you feel it bind as you start to rotate the plug, STOP! Remove the plug and start again. After you have threaded the plug all the way into the cylinder head, set your torque wrench to 12FT. LBS and torque the spark plug.
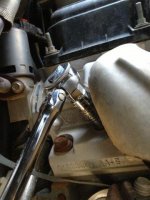

    IMG_2163.jpg

  6. Add a small amount of Dielectric grease to the coil pack terminal and spark plug terminal and install the wire. You should feel and hear a click as the plug wire terminal seats on the coil pack and spark plug terminals.
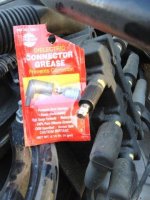
    IMG_2155.jpg

  7. Repeat the above steps to replace the remaining spark plugs and wires on the driver side.
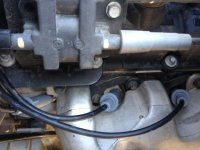

    IMG_2156.jpg

  8. Disconnect the spark plug wires at the coil using a twisting motion as you pull the plug away from the terminal. Take note of which plug wire connects to the coil pack. You can use a sharpie to write the cylinder number on the plug wire boot. Notice the coil pack has the cylinder number embossed on the case.
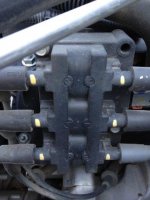

    IMG_2149.jpg

  9. Disconnect the plug wires from the passenger side spark plugs and carefully lift up on the heater hose retaining bracket to release it from the valve cover stand-off bolt. (This will give you a bit more room to maneuver the wires during installation.) Remove the crankcase vent hose from the valve cover as well.
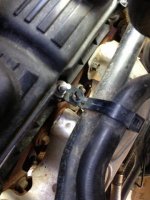

    IMG_2161.jpg

  10. Carefully lift up on the spark plug wire tray to remove the retainer from the rear valve cover stand-off bolt. Gently pull the wire assembly towards the passenger side and down to work the wires from behind the engine until they are free. Pay attention to the routing of the wires from behind the engine during removal. You may have to push the wires from the driver side a bit to prevent them from hanging up on the engine. (Note: The wire tray is plastic and may break during removal due to being brittle from heat and age. Replacing it at this time might be a good idea.)
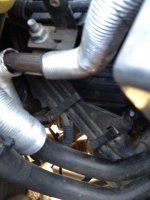
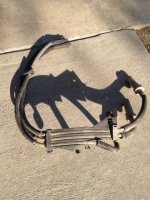
    IMG_2157.jpg IMG_2159.jpg

  11. Remove and replace the passenger side spark plugs.


    IMG_2164.jpg

  12. Carefully release the clips that hold the spark plug wires to the wire tray. Replace one wire at a time to maintain wire orientation and lengths until you have a complete assembly.
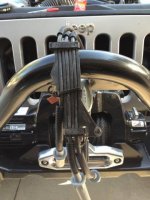

    IMG_2162.jpg

  13. Using masking tape, wrap the plug wire ends that go to the coil terminals together. (This will help you route the wires behind the engine as an assembly.
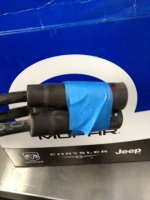

    wires1.jpg

  14. Route the taped end of the wires behind the rear of the passenger side valve cover from the top of the engine or, from under the wheel well if you removed the fender liner. Push the wires in behind the engine as far as you can until they are almost sticking out on the driver side of the engine. You may have to work the wires a bit to get them in the correct position. Then, using the mechanical fingers tool, grab one of the wire boots and pull it towards the driver side of the engine.
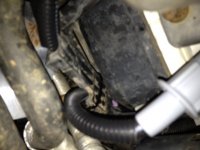
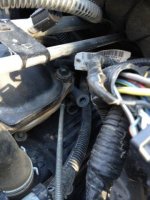
    wire2.jpg IMG_2166.jpg

  15. Reattach the wire tray to the valve cover stand-off bolt and reconnect the spark plug wires to the spark plug terminals. (See right side of picture)


    IMG_2157.jpg

  16. Reattach the heater hose retainer to the valve cover stand-off bolt and install the crankcase breather hose.


    IMG_2161.jpg

  17. Connect the spark plug wires to the coil pack terminals in the correct cylinder order after adding a small amount of dielectric grease to the terminals.
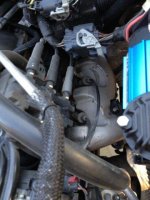

    IMG_2144.jpg

  18. Check all connections and all work performed. Twice!!

  19. Make sure you have removed all tools, rags, drop light and fender covers from the engine compartment.

  20. Re-connect the negative battery cable.

  21. Make sure your manual transmission is in neutral and apply the brakes before starting the engine; Make sure your automatic transmission is in park and the brake is set before starting the engine.

  22. After you start the engine you should have a smooth idle.


Done!
 
Why do I believe that if I tried to do this it would not be as simple as you made it look?;). Nice write-up, Tony:thumb:
 
Hey thanks guys! I wish I had taken better pictures to illustrate the process. I left out the part about how badly you will scratch up your arms while removing the wires. :crazyeyes:
 
Last edited:
Hey thanks guys! I wish I had taken better pictures to illustrate the process. I left out the part about how badly you will scratch up your arms while removing the wires. :crazyeyes:

Tony, I have a camera. We can make this right for you. Come over next Sunday and change the plugs on my Jeep. I promise to take photos of every step. I know you wanted to get more photos. I am happy to help you fulfill this wish. Just let me know what time.:)
 
Tony, I have a camera. We can make this right for you. Come over next Sunday and change the plugs on my Jeep. I promise to take photos of every step. I know you wanted to get more photos. I am happy to help you fulfill this wish. Just let me know what time.:)

Funny you mention that Dave. Don and Ray said the same thing but, they want me to bring lasagna too. I reluctantly agreed to their idea. You might as well join the party. Boy am I a sucker or what!?
 
Funny you mention that Dave. Don and Ray said the same thing but, they want me to bring lasagna too. I reluctantly agreed to their idea. You might as well join the party. Boy am I a sucker or what!?

Last time lasagna was involved, I don't think the job got finished:D
 
Here's a tip for those passenger side plug wires, before you pull them out tie some nylon string to the end of one of the wires, make sure it's long enough to leave something to grab hold of on both sides of the engine.

When you pull the old wires pull the string with it - tape the new wires as indicated above, tie the string around them and pull them through from the passenger side, you can pull all wires at once.

Great idea! I like it! Thanks for posting this up! :thumb:
 
Did this today and it went just as the write-up indicated. It was a little tight on the passenger side but not too bad. The toughest part for me was removing the spark plug boots. For two of them the wires ripped out...good thing we were replacing them. All told this took about an hour working slowly. I am at 98k miles and the engine started misfiring about 10k miles ago. Way overdue. Definitely do this earlier when the misfiring starts.

Also, make sure you use the nylon string to pull the new wires back behind the engine. Great advice and a great write up!

Wow 98k. You got some serious miles out of those plugs. Glad this write was helpful. Now you will enjoy a little better mileage and performance. Cheers!!!
 
Wanted to bump this thread for a spark plug wire question. I 've got my plugs, an air filter and a PCV valve purchased to do a tune up in the near future. I was wondering about the plug wires. I don't off road. My JK will have about 40K on it. The stock wires look OK. I know some will buy bigger, better wires to put on for performance enhancements. For someone like me, who uses it as a daily driver, would you change them out? They look fine and the Jeep runs OK. If you think I should change them, what should I use. Scanning the Net, there doesn't seem to be that many options. Some car parts stores with OE replacement wires, but they are awful cheap. I can buy a set of OE wires on E-bay for around $35-$40. What do you think?
 
Wanted to bump this thread for a spark plug wire question. I 've got my plugs, an air filter and a PCV valve purchased to do a tune up in the near future. I was wondering about the plug wires. I don't off road. My JK will have about 40K on it. The stock wires look OK. I know some will buy bigger, better wires to put on for performance enhancements. For someone like me, who uses it as a daily driver, would you change them out? They look fine and the Jeep runs OK. If you think I should change them, what should I use. Scanning the Net, there doesn't seem to be that many options. Some car parts stores with OE replacement wires, but they are awful cheap. I can buy a set of OE wires on E-bay for around $35-$40. What do you think?

Watch out for cheap wire sets, they usually fall apart quickly or even arch to ground due to poor materials and craftsmanship. I got a set of omni spark plug wires as they meet or exceed oe spec. You can find some crazy stuff if you look around, like 0ohm wires and high output coils... highly doubt there would be a performance gain on a 3.8 and chances are high you would get emi interference on your radio and possibly cb. Plus those wires cost $100+, I personally have better things to spend that cost difference on;)

Sent from my LG-D800 using WAYALIFE mobile app
 
Just did my spark plugs and I'm already seeing a difference in MPG and in throttle response! Best thing I've done in the last year!!!
 
Just did my spark plugs and I'm already seeing a difference in MPG and in throttle response! Best thing I've done in the last year!!!

That is awesome! It really is one of the best things you can do on a Jeep with over 60,000 miles. The best part is it's not too expensive a service when you do the work yourself. :yup:
 
What is a Mechanical Fingers Tool? Planning to do this but this is the only thing

What is a Mechanical Fingers Tool? Planning to do this but this is the only thing i am not sure of and when you used it during the demonstration.
 
What is a Mechanical Fingers Tool? Planning to do this but this is the only thing i am not sure of and when you used it during the demonstration.

Here's a picture. Basically a flexible steel rod with a plunger on one end and 4 steel fingers on the other end.

ImageUploadedByWAYALIFE1409188483.809942.jpg

ImageUploadedByWAYALIFE1409188501.346835.jpg

You can find them at most auto parts stores, sears and harbor freight.
 
Top Bottom