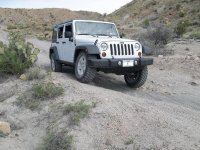
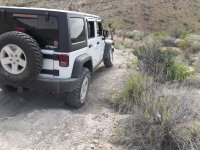
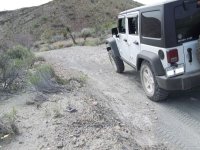
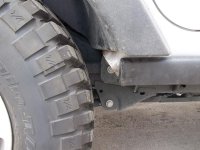
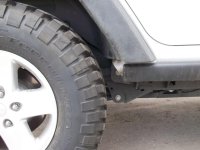
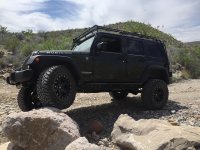
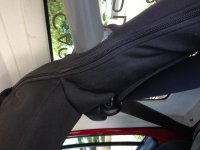
I guess it's the "Super Stocker" build

USMC Wrangler

New member
After being a pickup truck guy for many years, I decided to look at a Jeep. After test driving some friend's Jeeps and some new one's, I decided I would dive in.

My '99 F150 I traded in
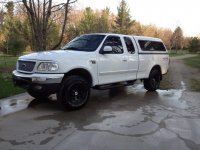
Photo Nov 20, 19 54 36.jpg

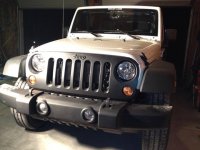
The new Jeep on July 9, 2013 and yes, the salesman made me practice my wave before leaving the lot!
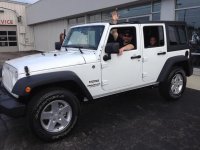
Photo Nov 20, 19 46 01.jpg

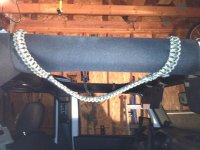
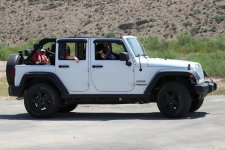
I knew I wanted to make the Jeep more capable off road, but decided to drive it for awhile to see what I really needed first. I did mostly visual mods like plastidip and paracord grab handles then I found some Rubi rails and some Rubi 18 springs for very cheap. I already had the 59's in the back. I swapped out my front springs then found some 1" spacers for the front and 3/4" spacers for the rear.

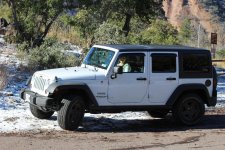
No Rubi springs or spacers...
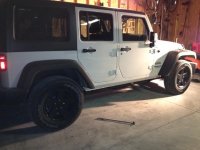
Photo Nov 20, 19 44 10.jpgPhoto Nov 20, 19 44 13.jpgPhoto Nov 20, 19 44 33.jpg

With Rubi springs, spacers and third row seat
IMG_2697.jpgIMG_4791.jpg

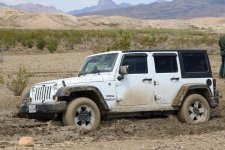
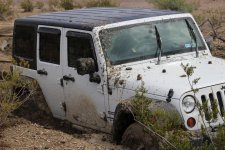
Last summer the family and I took a spin after some rain. Oh those wonderful SRA's turned into racing slicks. I knew it was time to start saving up for tires.
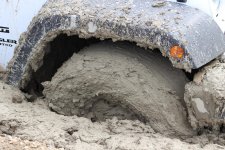
IMG_3350.jpgIMG_3353.jpgIMG_3363.jpg

My set of BFG KM2's in 255/80R17's arrived from Discount Tire Direct and I had them mounted on Thursday. I went with this size because I knew if I did a lift, gears, etc I would have to buy cheap crap on my budget. The Flashcal to Flashpaq purchase was also made in conjunction with the tires. It dialed in the speedo on the dot confirmed by two GPS's at 32" with 40 PSI for the road.
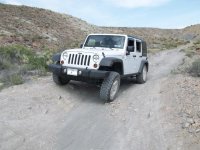
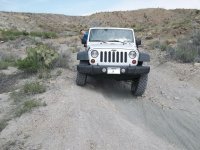
100_0991.jpg100_0992.jpg100_0993.jpg100_0994.jpg100_0995.jpg

I was worried about my darling wife hating the road noise. (BTW, I think these KM2's are pretty darn quiet considering the aggressive tread!) When she heard them, she said it's what she thought a Jeep should sound like! Then we saw another Jeep with a stubby bumper and winch. She looked at me and told me I need that for my Jeep too! All I could say was, "I love you!" Anyway...

Even though I probably didn't need to trim the rails it did concern me. So out came the chop saw to take 2" off the back of each rail...

Before the trim...
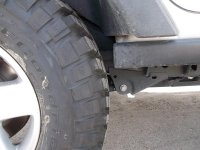
100_0986.jpg

...and after

100_0989.jpg100_0990.jpg

I still have the Rock Hard 4x4 3rd Row Accessory Bar sitting in the garage. I just need time to pull the top, even though I know it can be done with the top on. I have a build thread for the tube/trail doors I am still working on. I hope to have those done in the next few weeks. Next on my wish list will be to DIY front and rear bumpers and pick up a good winch. I also plan on gusseting the D30 C's in the near future and then drive it til I break it. I will probably go with the EVO Leveling kit when I get the front bumper and winch.

Time will tell what will or won't be added next. At it's current stage and my current budget, I don't regret making the leap from pickups to my Jeep! I know it's not some badass monster build, but it's been a fun ride and look forward to learning/enjoying more.
 
Last edited:
Looking good! Damn, had I known a few weeks ago you were looking for tires I would have made you a hell of a deal on 5 rubi wheels with the bfg mt's on them. Only got 8500 miles on them. Found a spot to try out the flex on old ore road...ImageUploadedByWAYALIFE1428286132.571275.jpg
 
Thanks for the welcome! :thumb:

No worries, Granite. I like the slightly taller KM2's...nice flex too! :icon_crazy:
 
After seeing Granite_head's War Pig, I realized I needed to get my stickers on so I didn't seem too much like a stalker drooling over other Jeeps. My second WAL sticker arrived today...

...so I "Wayalifed" the Jeep...


...and my welding cabinet! :rock:

 
I confirmed something that I suspected with the tall, skinny tires last night. We had a frog-choker of a storm move through the area causing water to run over the road. These tall-skinny's cut through deep puddles at 45-50 MPH without massive jerking of the steering wheel! :thumb: It was a slightly noticeable "tug" versus the SRA's which seemed to want to rip the steering wheel out of my hands. I realize the massively different tread styles may have something to do with it too, but I'm no engineer or physics major.

I know, kinda random info, but just throwing it out there if anyone else is considering a tire in this size, (all two manufactured in this size currently, BFG & Cooper).
 
You'll notice theres less rolling resistance with a slimmer tire in on road precipitation.

Consider that your footprint is smaller amd therefore there's less surface area for the water (or snow in winter) to resist. This is great for forward momentum as you can "cut" through poor road conditions where a flatter wider tire would get bogged down, pushed and redirected.

Sometimes this leaves you at a disadvantage i.e. from a srandstill you might experience less traction.

:Yup:
 
My 3rd row

Yes, I did install the third row myself. I have a family of 6 and we love to hike and just get outdoors, so with the JKU only seating 5 I looked into the third row. I first saw the bracket being sold to put a 2-door rear seat back there. The bracket is pricey, but started looking for slightly used/not wanted 2dr seats for sale. Every one of them I found were either close to me and way over what I wanted to spend, or they are too far away to pickup or too costly to ship. I found the dimensions of the following seat and went with that. Also found lap belts to solve that question. The seat brackets and seatbelt mounts are all mounted through the rear floor. I'm literally waiting on some steel plate to arrive today to use over the storage area. I'll try to get some pics loaded today with the seat in, brackets and mounting points.

Seatbelts

http://smile.amazon.com/gp/product/B000FQ7GCE/ref=oh_aui_search_detailpage?ie=UTF8&psc=1

Seat

http://smile.amazon.com/gp/product/B001892TQK/ref=oh_aui_search_detailpage?ie=UTF8&psc=1

^^^^That is where I got them

This shows the little legroom available. I could move the seat back about an inch only if the headrests were removed. So, little kids, yes...everyone else, very uncomfortable.


Here is one of the buckles. This is the passenger side. The bottom of the picture is the wheel well side for reference. I did trim the plastic storage piece to accommodate the bolt.


This is where I mounted both of the long portions of the lap belt. It is inside the storage area, so all the parts of the belt can be stored there when the seat is out. Again, I had to cut a hole in the storage area plastic to get this mounted.


These are the brackets for the front of the seat. I didn't use the rear one because I have nothing to bolt it to. The lap belts keep the passenger(s) from flying forward better than the spring loaded, single hook.


I have some 1/4" plate I am going to cut to fit under the storage cover for the rear seat rubber legs to sit on. For now, a 2x8 has worked fine.

In the future I may see about installing this rear facing to see if there is more legroom. For now, my 7 and 9 year-olds fit back here just fine.
 
Last edited:
Rock Hard 4x4 3rd Row Accessory Bar Install

For the added safety of my 3rd row passengers, I installed this today. Big props to Jason at RH4x4 for all his help. I freaked a little when the bar didn't just sit on my stock cage perfectly. We PM'd and talked on the phone to resolve my concerns. Jason can confirm this, but they build their parts from Chrysler's specs and the cage is supposed to be square, top to bottom. Mine is not, never been wrecked or rolled. To be clear, I am not bashing RH4x4 at all. This is just informational for anyone else considering this. I'm quite pleased with the end result and Jason's excellent customer service! Thanks again Jason!

Actual measurements of my Jeep...


Measurements of RH's bar based on Chrysler's specs...


Since the bottom was dead on I started from there and worked my way up. Using a dead blow hammer I hit and tapped until the top collars sat squarely on the stock cage and then level too. I eye-balled it a lot from the front and did a lot of measuring.

Here's how it sat on the stock cage at first...

Pass side top


Driver's side top


All bolted up!


The inside measurement from floor to inside of the hard top was 41 1/4" so I was shooting for 40" on the additional bar. This way if I bolt lights or other things on there later I have room to work with.


I will be pulling this to prime and paint with bedliner when I finish the DIY tube doors in the near future.

Thanks again to RH4x4 and Jason!
 
Great job on the 3rd row cage (RH-1032) install!

To get the collars inside the factory padding without cutting the zipper, cut 2 2" slits in an X pattern on the INSIDE of the padding next to the zipper. Trust me, there's enough slack in the factory material that it'll give over our collars. Set the cap in place on your factory tube, slip the RH-1032 collars through the X slits, tighten hardware, and zip up padding.

Done!

Thanks! :rock: That makes sense. I'll do that when I pull to paint.
 
Great job on the 3rd row cage (RH-1032) install!

To get the collars inside the factory padding without cutting the zipper, cut 2 2" slits in an X pattern on the INSIDE of the padding next to the zipper. Trust me, there's enough slack in the factory material that it'll give over our collars. Set the cap in place on your factory tube, slip the RH-1032 collars through the X slits, tighten hardware, and zip up padding.

Done!

Here's a pic of how James cut his in his red Rubicon.

IMG_1197.jpg
 
Nice Jeep! Are you running wheel spacers with those tires? I'm considering going a similar route with mine.

Thanks
 
Nice Jeep! Are you running wheel spacers with those tires? I'm considering going a similar route with mine.

Thanks! No, no wheel spacers. I've considered it, but haven't made a final decision. I did rub on that air dam thing under the front bumper a little bit in my first off the pavement excursion and front disconnected. My plan is to make front and rear bumpers at home, so I'm not worried about the rubbing right now.

Nice build man

Thanks bigtrucker!
 
Top Bottom