You are using an out of date browser. It may not display this or other websites correctly.
You should upgrade or use an alternative browser.
You should upgrade or use an alternative browser.
Factory JK D44 Rubicon E-Locker Wiring
- Thread starter matt
- Start date
Holeshot
Banned
I just did it two days ago. Very simple, but I guess it would be better to use relays. I thought the lockers solenoid would not take this much power. My switches becomes very hot when lockers are ingaged. I'm gonna add relays later this week.
Rubicon e-locker have a status switch on the side of the diff, to tell the TIPM to light up the locker indicator in the cluster when they're ingaged. If you want to know how to use it, it's very simple. just let me know.
Rubicon e-locker have a status switch on the side of the diff, to tell the TIPM to light up the locker indicator in the cluster when they're ingaged. If you want to know how to use it, it's very simple. just let me know.
Holeshot
Banned
I plugued mine on contura switches, they're rated to 20A. I took a quick look over other forums and many guys are not running relays and still no concern after over a year of use.
I have an ORE switch panel in route anyway, so my contura switches will probably serve as "locker enable switch" as a safety.
This is what the actual setup looks like.
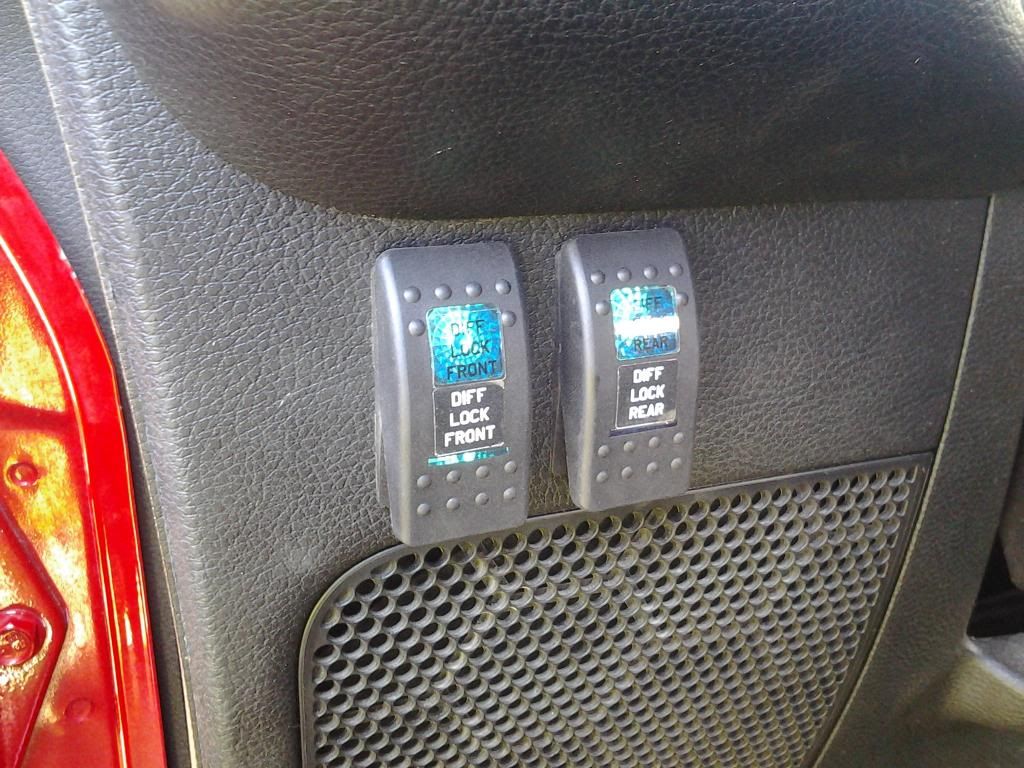

I have an ORE switch panel in route anyway, so my contura switches will probably serve as "locker enable switch" as a safety.
This is what the actual setup looks like.


jeeeep
Hooked
Mine is a sport, not a rubi. I installed a pair of rubi axles last week. :standing wave:
ahh! now that makes sense...
Clark Collins
New member
e-locker wiring
I am dealing with another forum member on a pair of rubicon axles and may want more info from you on the wiring. I would like to have the locker indicator in the cluster indicate when they are engaged. Are the switches holding up or should I plan on using relays? Where did you get the switches?
I just did it two days ago. Very simple, but I guess it would be better to use relays. I thought the lockers solenoid would not take this much power. My switches becomes very hot when lockers are ingaged. I'm gonna add relays later this week.
Rubicon e-locker have a status switch on the side of the diff, to tell the TIPM to light up the locker indicator in the cluster when they're ingaged. If you want to know how to use it, it's very simple. just let me know.
I am dealing with another forum member on a pair of rubicon axles and may want more info from you on the wiring. I would like to have the locker indicator in the cluster indicate when they are engaged. Are the switches holding up or should I plan on using relays? Where did you get the switches?
Holeshot
Banned
I took a pic of my wiring diagram. Gonna post it later tonight.
I made research and found that many people are running the exact same setup I actually run (no relays), and for over a year without any issue. My switches are rated to 20Amps. Don't think the actuators are taking this much power.
I made research and found that many people are running the exact same setup I actually run (no relays), and for over a year without any issue. My switches are rated to 20Amps. Don't think the actuators are taking this much power.
Holeshot
Banned
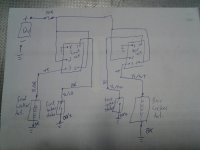
I used contura rocker switches
http://www.otrattw.com/proddetail.php?prod=V1D1J66B-AYC80-FL1
http://www.otrattw.com/proddetail.php?prod=V1D1J66B-AYC80-RL1
nmwranglerx
Caught the Bug
cool thanks for the wiring diagram, helpful. I not very familiar with reading them but seems pretty self-explanatory. Those are the exact switches I purchased and plan on using. See if I got this right, you have 1 wire (what gauge by the way? 16?) coming from positive side to a 30 amp inline fuse to power both switches. How did you split the wire to run to each switch? Did you ground each switch separately?
Holeshot
Banned
cool thanks for the wiring diagram, helpful. I not very familiar with reading them but seems pretty self-explanatory. Those are the exact switches I purchased and plan on using. See if I got this right, you have 1 wire (what gauge by the way? 16?) coming from positive side to a 30 amp inline fuse to power both switches. How did you split the wire to run to each switch? Did you ground each switch separately?
From the batt to the inside of the cab I used a 8ga wire BUT, I will add an entire switch panel later. If it is only for the switches, you can use 16ga all around.
to split the wires, I just spliced on the main power wire, and all soldered and isolated with special 3M tape that acts as a shrink tube. I also used 10 female terminals to connect to the switches .
You can ground the switches through the same wire (this is what I did but it's not drawn this way on the diagram). I grounded them on the lower part of the dash on the left, there's already 2 or 3 grounds from the factory dash harnesses.
The numbers on the switches are the pin numbers on the back of the switches. This way, the lower light will serve as a status light. Lit when engaged and off when not engaged. The upper light light up when you press the switch.
Clark Collins
New member
axle swap
Anyone on this thread: As mentioned in my previous post I'm possibly going to buy rubi axles from another forum member. How tough was the axle swap? I do not have access to a lift and would be doing it with a floor jack and jack stands. Did you have a shop lift? I am 71 years old, but would have help doing this, and I don't want to have to pay to have them installed. I've installed all the mods to my JK myself so far, but those axles are heavy.
BTW I used to be an electrician and 16 guage is too small for a 30amp circuit. It's only good for about 10amps. 10 guage would be required on a 110v circuit and I think that DC circuits would likely need the same size wire to protect them. 14 is good for 15amp, 12 for 20amp and your 8 would be good for about 50amps I think. I never did DC work, but the purpose of the fuse is to protect the wiring. A heavy load on that 16 guage could cook the insulation right off it. Does anyone know what those actuators actually draw? They would likely have a larger load to actuate, but smaller load to maintain.
I really appreciate the information you are providing here. The wiring diagram and switch info will make that part of this project easy. It's great having a source for this kind of help.
Last edited:
Holeshot
Banned
The axle swap itself is not very difficul. It took me 2h45 to drop the old (both) but took soo much longer to get back under the jeep. Gotta say that I installed new coils, new shocks, did a brake maintenance, flushed both diff and inspect + motor oil change and also had to clean some brackets.
All this with power tools, a shop lift, long stands and transmission jack and a tool box full of tool (mine, since I'm a technician in a ford dealer)
Concerning the wire gauge, according to this chart,
http://assets.bluesea.com/files/resources/newsletter/images/DC_wire_selection_chartlg.jpg
Between 0 and 20 ft, up to 10A you can use 16ga. BUT, if I look at the factory wiring diagram, the wire used are 18GA, so I guess 16 is enough :thumb: In the OE diagram, they use relays, but its because it is controlled by the TIPM which use a very low current to drive power to the actuators.
The 30 amp I used is only in case of a short, I could have used a 10 or 15 amp and maybe it would be fine. When I get a chance I will measure the amp draw on the actuator circuit.
hope this help.
nmwranglerx
Caught the Bug
if I look at the factory wiring diagram, the wire used are 18GA, so I guess 16 is enough :thumb:
hope this help.
In my research I found the actuator only draws about 4 amps. I did not do the test myself but got info from a reliable source. I'd be interested to hear what you find out...
nmwranglerx
Caught the Bug
Clark, I will be swapping out the rear axle this weekend in my driveway. I'll be using jack stands and hand tools of which I have a pretty good collection. I've done a fair amount of mods this way, from transfer case swap to driveshaft replacement. Also installed a coil suspension lift before getting my current long arm setup. I'll have a buddy helping me out. I feel pretty confident about it. Just gonna take my time. I'll let you know how it goes.
I just did mine to day to my 2013 Sport with 2013 Rubi axles.
First off was to order a Daystar switch panel that replaces the net panel in front of the shifter. These are only for auto trans, but I modified it to work with my manual as shown in the pics. The trimming is required to allow the panel to fit over the shifter boot, looks ugly, but can't be seen as it's hidden by the boot. I ordered 2 Contura switches and bought a safety guard power switch to operate the lockers. I thought I had a pic of the wiring of the switches, but I must of forgot to. With all those pins, I only have 6 wires coming out of the panel. I've included a pic of the diagram of how I wiried the switches and at least I got a pic of the backside with the switches in the panel.
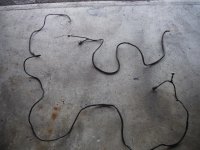
Next was to buy a stock Rubi locker harness, totally strip it down and rebuild it up to the 4 connectors needed. As you can see, it's not a stand-alone harness stock so was a bit of work. I routed the rear harness I made through the right tail-light housing into the cabin and fed it forward under the bed lip and pax-side kick-panels. I still need to install the front harness as I only have a few hours of warmth to work in during this cold snap, so will post a follow-up for that later.
I found an orange/grey dimming wire in an exposed harness in the pax footwell and tapped that for the locker identity light on the switches. I have an 8 post fuse panel mounted behind the glove-box for accessories that I used for On power with a 15amp fuse. A relay is not requied for this install. Ground posts are everywhere on my Jeep, so just use one convenient for you. I used one in the pax footwell.
Basically what I have is, green locker switch identity lights wiried into the dimming light circuit, a Master power switch that feeds power to the locker switch, and when the locker switch is On, sends power to the locker and when the locker contacts in the axle closes and completes a ground, the Red locked light illuminates providing a positive locked indication.
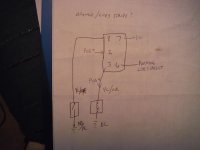
![011-5[1].jpg 011-5[1].jpg](https://www.wayalife.com/data/attachments/45/45545-f89b681bc6da475e5d198617adc00b62.jpg)
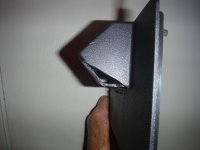
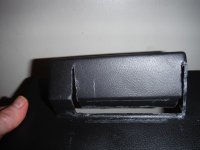
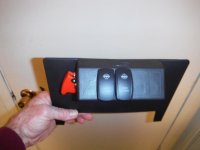
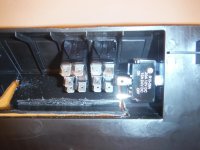
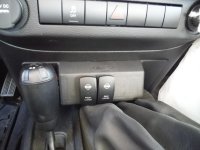
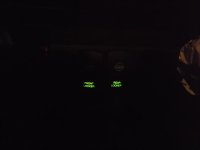
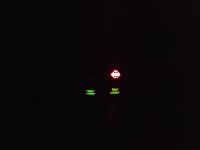
First off was to order a Daystar switch panel that replaces the net panel in front of the shifter. These are only for auto trans, but I modified it to work with my manual as shown in the pics. The trimming is required to allow the panel to fit over the shifter boot, looks ugly, but can't be seen as it's hidden by the boot. I ordered 2 Contura switches and bought a safety guard power switch to operate the lockers. I thought I had a pic of the wiring of the switches, but I must of forgot to. With all those pins, I only have 6 wires coming out of the panel. I've included a pic of the diagram of how I wiried the switches and at least I got a pic of the backside with the switches in the panel.
Next was to buy a stock Rubi locker harness, totally strip it down and rebuild it up to the 4 connectors needed. As you can see, it's not a stand-alone harness stock so was a bit of work. I routed the rear harness I made through the right tail-light housing into the cabin and fed it forward under the bed lip and pax-side kick-panels. I still need to install the front harness as I only have a few hours of warmth to work in during this cold snap, so will post a follow-up for that later.
I found an orange/grey dimming wire in an exposed harness in the pax footwell and tapped that for the locker identity light on the switches. I have an 8 post fuse panel mounted behind the glove-box for accessories that I used for On power with a 15amp fuse. A relay is not requied for this install. Ground posts are everywhere on my Jeep, so just use one convenient for you. I used one in the pax footwell.
Basically what I have is, green locker switch identity lights wiried into the dimming light circuit, a Master power switch that feeds power to the locker switch, and when the locker switch is On, sends power to the locker and when the locker contacts in the axle closes and completes a ground, the Red locked light illuminates providing a positive locked indication.

![011-5[1].jpg 011-5[1].jpg](https://www.wayalife.com/data/attachments/45/45545-f89b681bc6da475e5d198617adc00b62.jpg)


I like how you did your wiring. I wonder why I didn't think about it. Put the status switch in line with the locker actuator, and use the bottom light of my switches on the parking light circuit.. I might do an upgrade sometime :thinking:
This is how I did my positive locked lights on my TJ, but I don't want to go tearing into a non-rattling dash and cause that to happen.
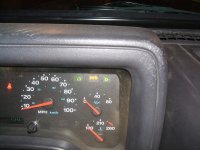
Clark Collins
New member
Clark, I will be swapping out the rear axle this weekend in my driveway. I'll be using jack stands and hand tools of which I have a pretty good collection. I've done a fair amount of mods this way, from transfer case swap to driveshaft replacement. Also installed a coil suspension lift before getting my current long arm setup. I'll have a buddy helping me out. I feel pretty confident about it. Just gonna take my time. I'll let you know how it goes.
I am finally getting around to getting a set of Rubi axles from a forum member and have come back to this thread. Tell me how your axle swap went. I haven't picked up the axles yet and any information you can share to make this project easier would be greatly appreciated.
Anyone else who has done an axle swap this way feel free to chime in. Thanks!
Last edited:
