Over the years, Jeep has come a long way in beefing up the Wrangler and with the new JK model, I was pleasantly surprised to see it come complete with skidplates protecting the automatic transmission, transfer case and gastank. Sure they get beat up pretty good but, to this day, they are all that we run and they've held up just fine. Having said that, there has always been one vital component that I could never figure out why Jeep would leave it so exposed and, that would be the oil pan. While I'm not a big fan of aftermarket skid plates that replace what you already have, I am a firm believer that any exposed part that can leave you high and dry if broken should be protected. Needless to say, that is the reason why we decided to install the all new 2007-11 EVO MFG ProTeK Oilpan Skidplate on our JK.
What you will need
• 10mm socket and wrench (a 1/4" drive socket will make this job easier)
• 1/4" drive ratchet
• 6" - 1/4" drive ratchet extension
• Inch pound torque wrench (must be one that goes below 85 in. lbs.)
The oil pan is the only vital component under your Jeep that is left completely exposed and, as you can see in this shot, vulnerable to hits.
Time to armor up - Here's a shot of the all new EVO MFG ProTek Oilpan Skidplate. As you can see, it comes complete with mounting tabs for the optional automatic transmission skidplate they offer.
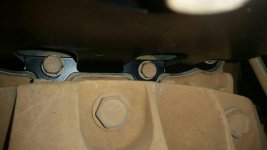
1. For safety reasons, EVO MFG recommends that you completely drain your oil prior to installing their oil pan skidplate. I chose to leave the oil in place, but made sure that it was completely cool prior to working on it. Having said that, use a 10mm socket attached to a ratchet extension and carefully remove all the bolts securing the factory oil pan to the engine. DO NOT remove the pan from the engine and, if you chose to leave your oil inside like I did, be careful not to bump into or hit the pan as doing so can cause the RTV seal to break free.
2. Carefully hold the EVO MFG oil pan skidplate up over the factory oil pan and loosely secure it in place using the 2 of the factory bolts on opposite sides of the pan. Then, using just your fingers, loosely thread in the rest of the factory oil pan bolts so that they are in at least 3 full turns. <strong>NOTE:</strong> These steel bolts are being threaded into aluminum and you can easily damage the threads if you aren't careful.
3. Using a 1/4" drive 10mm socket attached to a ratchet extension, carefully fasten all the bolts until they are just starting to touch the surface of the EVO MFG skidplate. DO NOT fully tighten any of the bolts at this time.
4. With all the bolts making surface contact with the EVO MFG oil pan skidplate, use a 1/4" drive inch pound torque wrench set to 85 in. lbs. and carefully begin tightening all the bolts working in a criss-cross star patern. Remember to do this slowly and working your way around a few times.
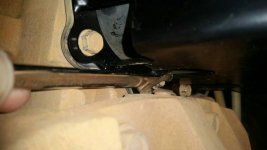
5. The corner bolts will be very difficult to get to with a socket and so I just used a 10mm wrench to tighten them up. Just be mindful of how tight you are tightening them and be sure to double check them after about 100 miles.
http://project-jk.com/gallery2/main.php?g2_view=core.DownloadItem&g2_itemId=273267[img]
6. If you had drained your oil before starting this install, you can now refill your engine with fresh oil.
That's pretty much it. A super easy install for a really great part that every JK should have. Below are some final pics of what the ProTek Oilpan Skidplate looks like installed.
[B][SIZE=4]Installed Photos[/SIZE][/B]
[img]http://project-jk.com/gallery2/main.php?g2_view=core.DownloadItem&g2_itemId=273270


