AllAmericanInfidel
Caught the Bug
Just a quick write-up for those of you considering the Cobra 75WXST CB. I ordered mine as a kit with coax cable and 4’ Firestick antenna from Northridge 4x4. You can find the package here: http://www.northridge4x4.com/cobra-75wxst-cb-18-coax-cable-firestik-package
Admittedly, I worked my way from back to front. I also read magazines this way. Weird, I know! I first mounted the Firestick Antenna to a center mounted Full Metal Fabworks antenna mount. This mount works great with the EVO MFG GatePlate, as seen below.
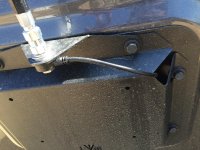
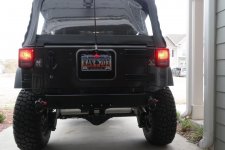
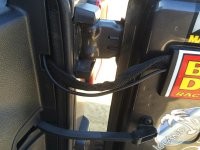
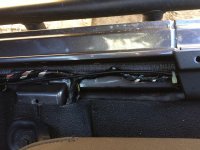
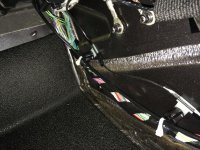
I ran the coax cable through the tailgate vent and behind the plastic cover on the inside of the tailgate. I zip tied the coax to the wire loom that is already running through it. From there, I ran the coax under the rear cargo trim and under the carpet, following the wiring harness along the passenger side, all the way to underneath the dash.

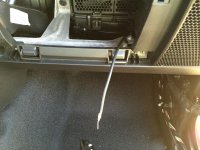
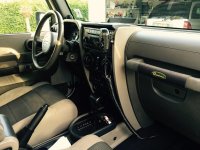
I then mounted the CB receiver/transmitter underneath the glove box. The glove box is very easy to take out. With the glove box open, just push the sides of the glove box inward and lift up. I opted to mount the CB to the Jeep using some strong zip ties rather than drilling into anything under the dash.
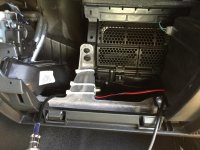
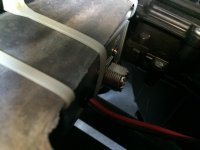
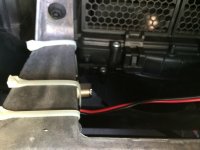
The ground and power wires I ran through the passenger side of the Jeep. There is a small area where you can do this located under the passenger side dash panel. I opted to ground the black wire to an already existing blot located just underneath the panel.
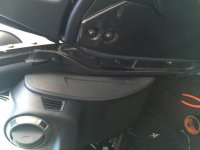
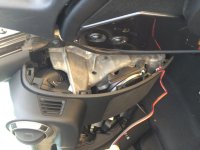
The power wire or ‘hot’ wire I ran through a small hole that goes through the firewall and comes out just under the cowl when the hood is open.
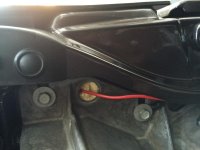
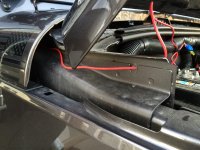
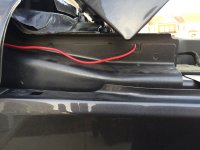
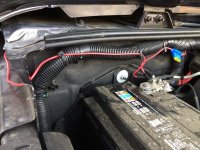
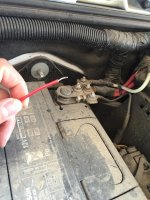
To do that, I used a thick wire coat hanger to punch a hole through the spray foam that whether proofs the hole. Once I made a passage, I then taped the red power wire to the coat hanger and ran it with the power wire through the same passage I just made. I then hooked the power wire directly to the battery so that I have the option to use the CB even if the vehicle is not on or running.
I opted, at the advisement of a few members here on WAYALIFE, to use the Cool Tech CB hand mic mount. This is very easy to install and come with instructions that are easy to read and understand. I hooked the hand mic up to the CB unit and ran the mic cable under the dash, securing it along the way to existing wiring with zip ties.
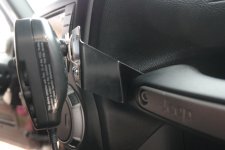
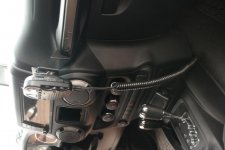
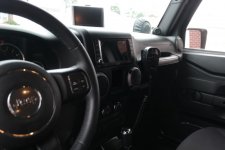
Before re-installing the glove box, I hooked up an external speaker which also came in the kit. I again routed the power cable from the CB box to the center of the dash following existing wires, securing them along the way with zip ties. I opted to mount the external speaker on the extra space I had beside my windshield light switch located on the Daystar lower dash switch panel.
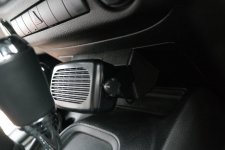
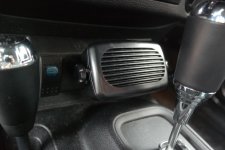
I have heard others complain about the volume of this unit not going loud enough. I can say from personal experience that with the provided external speaker, I have had no issues hearing anything from it, even with the doors off at highway speeds.
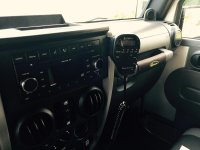
Well, that’s it folks. It is a very easy install, even for someone like me who usually catches stuff on fire when I mess with wires. From start to finish, I had this unit installed in about 1 hour. I love the clean look it gives inside the Jeep, with only the hand mic showing. So far, I have been pleased with this unit and have had no issues communicating while on the interstate. Hope this helps! If you have any questions or need pictures of something specific, please feel free to ask!
Admittedly, I worked my way from back to front. I also read magazines this way. Weird, I know! I first mounted the Firestick Antenna to a center mounted Full Metal Fabworks antenna mount. This mount works great with the EVO MFG GatePlate, as seen below.


I ran the coax cable through the tailgate vent and behind the plastic cover on the inside of the tailgate. I zip tied the coax to the wire loom that is already running through it. From there, I ran the coax under the rear cargo trim and under the carpet, following the wiring harness along the passenger side, all the way to underneath the dash.


I then mounted the CB receiver/transmitter underneath the glove box. The glove box is very easy to take out. With the glove box open, just push the sides of the glove box inward and lift up. I opted to mount the CB to the Jeep using some strong zip ties rather than drilling into anything under the dash.


The ground and power wires I ran through the passenger side of the Jeep. There is a small area where you can do this located under the passenger side dash panel. I opted to ground the black wire to an already existing blot located just underneath the panel.


The power wire or ‘hot’ wire I ran through a small hole that goes through the firewall and comes out just under the cowl when the hood is open.


To do that, I used a thick wire coat hanger to punch a hole through the spray foam that whether proofs the hole. Once I made a passage, I then taped the red power wire to the coat hanger and ran it with the power wire through the same passage I just made. I then hooked the power wire directly to the battery so that I have the option to use the CB even if the vehicle is not on or running.
I opted, at the advisement of a few members here on WAYALIFE, to use the Cool Tech CB hand mic mount. This is very easy to install and come with instructions that are easy to read and understand. I hooked the hand mic up to the CB unit and ran the mic cable under the dash, securing it along the way to existing wiring with zip ties.


Before re-installing the glove box, I hooked up an external speaker which also came in the kit. I again routed the power cable from the CB box to the center of the dash following existing wires, securing them along the way with zip ties. I opted to mount the external speaker on the extra space I had beside my windshield light switch located on the Daystar lower dash switch panel.


I have heard others complain about the volume of this unit not going loud enough. I can say from personal experience that with the provided external speaker, I have had no issues hearing anything from it, even with the doors off at highway speeds.
Well, that’s it folks. It is a very easy install, even for someone like me who usually catches stuff on fire when I mess with wires. From start to finish, I had this unit installed in about 1 hour. I love the clean look it gives inside the Jeep, with only the hand mic showing. So far, I have been pleased with this unit and have had no issues communicating while on the interstate. Hope this helps! If you have any questions or need pictures of something specific, please feel free to ask!

