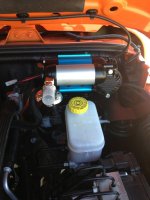
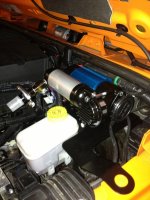
Airing down your tires for the trail is an essential part of off-roading and one that will give you significantly better traction on the rocks and will also offer a much more comfortable ride. However, getting your tires aired back up at the end of the day can be somewhat of a problem especially if you’re still a ways off from a gas station with a working air compressor. Of course, the best solution to this problem is to bring your own source of air but a good hard mounted compressor or CO2 air tank can take up a lot of space inside your Jeep and most of the basic portable units simply don’t have what it takes to fill up four over sized tires in a reasonable amount of time. And, that’s why we decided to get an ARB High Output On-Board Air Compressor for our old 2009 Jeep JK Wrangler Unlimited.
Compact and powerful, the ARB High Output On-Board Air Compressor is affordable and can be installed with ease under the hood. With this setup, you’ll have a reliable source of air with you at all times and without taking up any space inside your Jeep.To find out how easy it really is to install the ARB High Output On-Board Air Compressor on your Jeep JK Wrangler, simply follow the instructions below.
What you will need
• 12,13,19mm
Socket & Wrench
• 10mm Deep Socket
• Ratchet
• Wire Cutters
• Needle Nose Pliers
• Solderless Terminal Pilers
• Small Flathead Screwdriver
• Teflon Tape
• Electrical Tape
• Zip Ties
• Wire Coat Hanger
• Utility Knife
• Panel Trim Remover Tool
What you will need to get
• ARB High Output On-Board Air Compressor
• ARB Air Compressor Hose Kit
• Brake Booster Mounting Bracket
• Daystar JK Switch Panel
Instructions
Here’s a shot of all the components you will need including the ARB High Output On-Board Air Compressor, Hose Kit and under the hood mounting bracket.
1. Using a 13mm wrench, remove the 2 nuts securing your master cylinder to the brake booster.
2. Slip the ARB compressor mounting bracket over the studs as shown in this pic.
3. Reinstall your master cylinder onto the mounting studs on the brake booster and secure it in place using the factory nuts. A 13mm wrench will be needed for this job.
4. Take the 4 carriage bolts that come with the kit and insert them into the mounting holes on the ARB air compressor as shown this pic.
5. Carefully place the ARB air compressor on top of the mounting bracket making sure that all 4 carriage bolts go through. Then, loosely install the nuts provided onto the bolts.
6. Using a 10mm deep socket, secure the ARB air compressor to the mounting bracket by tightening up the 4 nuts.
7. Firmly grab the plastic red plug on the front of your ARB air compressor and remove it as shown.
8. Install the round ARB air filter onto the threaded hole where the plastic red plug was attached to.
9. Take the pressure sensor that came with your ARB air compressor and remove the plastic red plug.
10. Apply some teflon tape to the threads of your ARB air compressor pressure sensor.
11. Using a pair of needle nose pliers, remove the plastic red plug from the side of your ARB air compressor as shown.
12. Using a 10mm wrench, loosen the nut on the back of your ARB air compressor so that you can rotate the small tank up or down as needed to provide enough room for the pressure sensor and valve connector.
13. Apply some teflon tape to the threads of your ARB air compressor 3-way splitter as shown.
14. Attach the ARB air compressor pressure sensor to the 3-way splitter provided.
15. Attach the ARB air compressor valve connector to the 3-way splitter and secure it in place using a 19mm wrench.
16. Install the assembled 3-way splitter onto the side port on your ARB air compressor as shown.
17. Rotate the small tank on your ARB compressor until the valve is properly positioned and then secure it in place by tightening the mounting nut using a 10mm wrench.
18. Lay the long wiring harness that comes with the ARB air compressor along the firewall so that it extends from the battery to the brake booster. Then, attach the two plugs onto the pressure switch as shown in this pic.
19. Plug the power connector of your ARB air compressor into the receiving end of the wiring harness.
20. Position the weather protected fuse terminal so that it’s easily accessible and then zip tie it to the wiring harness attached to your fire wall.
21. Install the relay that comes with your ARB air compressor kit into the wiring harness plug.
22. Making sure that the relay is positioned vertically, zip tie it in place to the wiring harness attached to your firewall as shown in this pic.
23. Secure the rest of your ARB air compressor wiring harness by zip tying it to the wiring harness attached to your firewall.
24. Over on the passenger side, attach the provided solderless ring terminal to the red power lead extending from the ARB air compressor wiring harness.
25. Attach the provided solderless ring terminal to the black ground lead extending from the ARB air compressor wiring harness.
26. Using a 10mm wrench, remove the nut attached to the body of your Jeep right next to the fuse box, attach the ARB air compressor ground wire to the stud and then reinstall the nut securing everything in place.
27. Using a 12mm wrench, remove the nut on top of your negative battery clamp.
28. Using a 10mm wrench, remove the nut on top of your positive battery clamp.
29. Attach the ARB air compressor red power lead to your positive battery clamp and secure it in place using the factory nut. A 10mm wrench will be needed for this job.
30. Attach the ARB air compressor black ground lead to your negative battery clamp and secure it in place using the factory nut. A 12mm wrench will be needed for this job.
31. Open up the passenger side door of your Jeep and pry off the dashboard side panel. Then, push a straightened out wire coat hanger through the small foam filled hole on the firewall as shown in this pic.
32. Back under the hood, tape the multiple colored switch wires extending from the ARB air compressor wiring harness to the end of the wire coat hanger.
33. Back inside your Jeep, pull the wire coat hanger back out through the hole. You should now have the multiple colored switch wires inside the cab.
34. Using a trim panel tool or flathead screwdriver, pry off the bottom panel of your dash as shown.
35. Take your new Daystar switch panel and carefully cut out one of the knockouts using a utility knife.
36. Take the remaining wiring harness that comes with the ARB air compressor kit, locate the white plug ends, connect the two together.
37. Carefully color match and insert the loose wires that you just brought in through the firewall into the slots of the blank plug end as shown in this pic.
38. Assemble the rocker plate onto the switch provided with the ARB air compressor kit.
39. Install the ARB air compressor rocker switch into the opening you made in the Daystar switch panel.
40. Take the wires tagged with the label ISOLATION SWITCH and connect the pre-terminated wire ends to the back of the switch. Please refer to the wiring diagram that comes with the ARB air compressor kit for proper placement and to complete this job. Please take note that there will be one additional loose RED/YELLOW wire and it will need to be connected to a 12 volt source. I just hooked mine up to my battery as I prefer to have my lockers stay on even with the engine off. This is especially helpful if you have a manual transmission.
41. Using a small flathead screwdriver, remove the metal trim tab clips attached to your factory dash panel and attach them to your new Daystar switch panel. Then, install your Daystar switch panel to the dash.
42. Last but not least, install the head shield onto the quick release chuck on your ARB air compressor. This shield will make it easier for you to release the air hose when everything is hot under your hood.
43. Turn on the switch inside your Jeep and then check under the hood to make sure everything is working properly.
Using the ARB High Output On-Board Air Compressor is as simple as plugging in one end of the air up hose to the quick release chuck on the compressor and then the other end to your tire using the valve stem chuck provided with the kit. Turn on the switch and check the pressure in your tires from time to time with an air pressure gauge.
It really is as simple as that. Please let me know if you have any questions.


