dcbjk
Caught the Bug
So this is my first write up to be honest
So D-day2.0 has 117000 miles, my mpg was starting to decrease and the only thing I hadnt done was a tune up.
I changed spark plugs and recharged my K/N filter
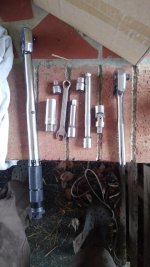
To start things off you will need
- 3/8 drive Wratchet w/ long extension
- 5/8in spak plug socket
- 8mm Socket
- 10mm Socket
- 10mm Wrench
- 3/8 torque wrench
- Spark plug gap tool
- 3/8 drive universal bit
Parts list
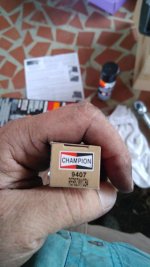
- K/N recharge kit
- Champion RER8ZWYCB4 Iridium Spark plugs x6
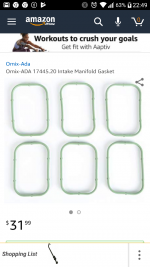
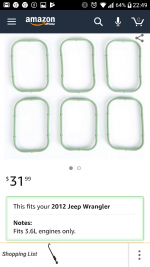
Before getting started I may note that one thing I didnt see any need of doing was replacing the intake manifold gaskets. However in all the videos I watched before doing this all people in the vids recommended replacing the intake manifold gaskets.
Look at POST #6 FOR INTAKE MANIFOLD GASKET PART #
Step 1
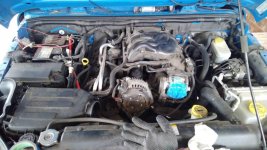
Using 10mm Socket remove the air intake hose
Step 2
Next thing using the 10mm, 8mm Socket with wratchet and extension begin removing the nuts, bolts, plugs and hoses from the intake manifold. This makes get to the plugs so much easier. Here are the pis of what I had to remove.
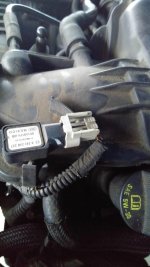
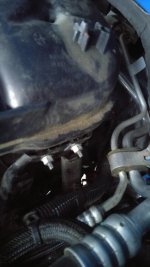
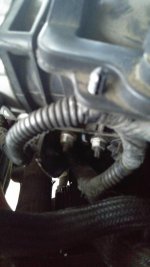
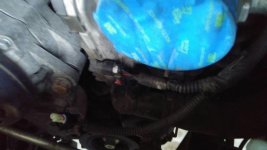
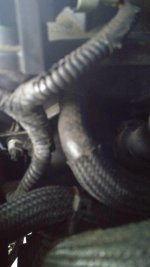
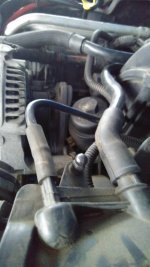
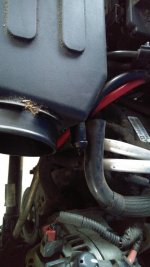
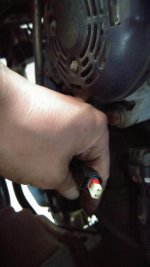
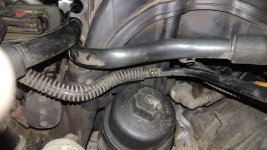
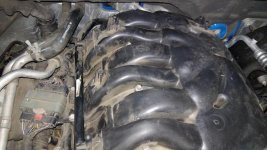
I know there will a few questions as to where everything is so feel free to ask if not sure.
Last but not least remove the foam at the back of the manifold which is held together with two 10mm bolts
Phew Step 3
Very carefully remove the intake manifold keeping it as clean as possible.
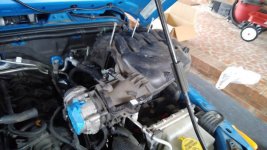
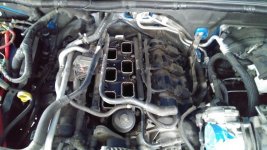
Next remove the foam surrounding the driver side coil packs

Step 4
Using the 5/8in spark plug socket, 3/8 drive extention, 3/8 drive wratchet, 3/8 drive torque wrench and 10mm socket
Begin removing the spark plug coil packs. They are flexible and should pop off with ease.
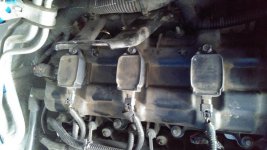
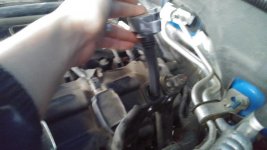
Then remove and replace the spark plugs one at a time
After replacing each plug retighten by hand then torque each plug to 13ft/lbs.
Step 5
Reinstall each coil pack and retighten the bolts to secure each coil pack torque to 13 ft/lbs
Reinstall the foam around the 3 driver side packs, then reinstall the intake manifold this may take a bit of time with so much being around the manifold but take your time. No Rush
Step 6
Reinstall the foam behind the intake manifold, then reintall each of the nuts and bolts around the manifold along with all of the plugs and hoses that were disconnected
Refer to Step 2 for pictoral reference
Retorque all the bolts around manifold to 11ft/lbs
Then its time to recharge your aftermarket air filter mine is a K/N or replace your stock filter if you have one this part of the write up is recharging a K/N filter. Refer to parts list for parts needed.
Step 1
With the air intake hose removed from replacing spark plugs, remove air filter.
Using the K/N filter cleaning spray each side of the filter evenly and let sit for 10 minutes.
Step 2
Using low pressure water wash filter from clean side out.
Shake off excess water and let filter dry.
Step 3
When filter has dried up using the K/N aerosol filter oil spray each of ths filter evenly from approximately 6 inches away and let filter wick for 20 minutes.
Step 4
Once filter has wicked for 20 minutes reinstall filter into air box and reinstall air intake hose.
Now that everything has been connected, tightened and torqued. Fire up the Jeep and ride.
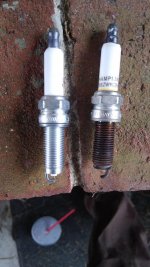
Out of my 6 plugs I had 3 bad plugs, but I replaced all 6 while I was at it.
The standard gap is .044 inches I had .050, .055 and .056 inches.
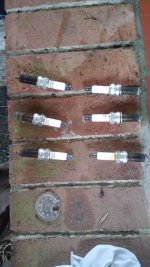
This last picture represents how the plugs sat in the engine from left to right is the passenger and driver side plugs.
Feel free to let me know of anything I may have overlooked or anything that needs to be changed.
I hope yall benefit from this as much as I did D-day2.0 runs smoothe as silk.
Sent from my LG-US701 using WAYALIFE mobile app
So D-day2.0 has 117000 miles, my mpg was starting to decrease and the only thing I hadnt done was a tune up.
I changed spark plugs and recharged my K/N filter
To start things off you will need
- 3/8 drive Wratchet w/ long extension
- 5/8in spak plug socket
- 8mm Socket
- 10mm Socket
- 10mm Wrench
- 3/8 torque wrench
- Spark plug gap tool
- 3/8 drive universal bit

Parts list
- K/N recharge kit
- Champion RER8ZWYCB4 Iridium Spark plugs x6

Before getting started I may note that one thing I didnt see any need of doing was replacing the intake manifold gaskets. However in all the videos I watched before doing this all people in the vids recommended replacing the intake manifold gaskets.
Look at POST #6 FOR INTAKE MANIFOLD GASKET PART #
Step 1
Using 10mm Socket remove the air intake hose

Step 2
Next thing using the 10mm, 8mm Socket with wratchet and extension begin removing the nuts, bolts, plugs and hoses from the intake manifold. This makes get to the plugs so much easier. Here are the pis of what I had to remove.


I know there will a few questions as to where everything is so feel free to ask if not sure.
Last but not least remove the foam at the back of the manifold which is held together with two 10mm bolts
Phew Step 3
Very carefully remove the intake manifold keeping it as clean as possible.


Next remove the foam surrounding the driver side coil packs

Step 4
Using the 5/8in spark plug socket, 3/8 drive extention, 3/8 drive wratchet, 3/8 drive torque wrench and 10mm socket
Begin removing the spark plug coil packs. They are flexible and should pop off with ease.


Then remove and replace the spark plugs one at a time
After replacing each plug retighten by hand then torque each plug to 13ft/lbs.

Step 5
Reinstall each coil pack and retighten the bolts to secure each coil pack torque to 13 ft/lbs
Reinstall the foam around the 3 driver side packs, then reinstall the intake manifold this may take a bit of time with so much being around the manifold but take your time. No Rush
Step 6
Reinstall the foam behind the intake manifold, then reintall each of the nuts and bolts around the manifold along with all of the plugs and hoses that were disconnected
Refer to Step 2 for pictoral reference
Retorque all the bolts around manifold to 11ft/lbs
Then its time to recharge your aftermarket air filter mine is a K/N or replace your stock filter if you have one this part of the write up is recharging a K/N filter. Refer to parts list for parts needed.
Step 1
With the air intake hose removed from replacing spark plugs, remove air filter.
Using the K/N filter cleaning spray each side of the filter evenly and let sit for 10 minutes.
Step 2
Using low pressure water wash filter from clean side out.
Shake off excess water and let filter dry.
Step 3
When filter has dried up using the K/N aerosol filter oil spray each of ths filter evenly from approximately 6 inches away and let filter wick for 20 minutes.
Step 4
Once filter has wicked for 20 minutes reinstall filter into air box and reinstall air intake hose.
Now that everything has been connected, tightened and torqued. Fire up the Jeep and ride.
Out of my 6 plugs I had 3 bad plugs, but I replaced all 6 while I was at it.
The standard gap is .044 inches I had .050, .055 and .056 inches.

This last picture represents how the plugs sat in the engine from left to right is the passenger and driver side plugs.
Feel free to let me know of anything I may have overlooked or anything that needs to be changed.
I hope yall benefit from this as much as I did D-day2.0 runs smoothe as silk.
Sent from my LG-US701 using WAYALIFE mobile app
Last edited:

