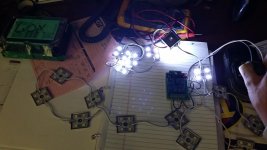
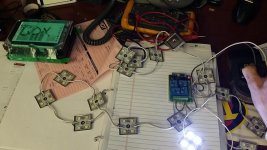
pvanweelden
New member
Could there really be such a thing as a $10 wireless switch pod?
Yes there could be. Would be as reliable as having actual switches and relays, no. but hey, its only 10 bucks.
10 Amps max per channel, 4 channels total.
http://www.ebay.com/itm/New-12v-4-C...ntrol-Receiver-Momentary-Switch-/160957051029- this one has a cheaper looking remote $10 + Free shipping
http://www.ebay.com/itm/12V-4-Chann...ion_Controls_Touchscreens&hash=item2586fd04fb - this is one in my first pics- $15 + $6 shipping
It could run 120 watts of lights per channel. ie- a set of 12- 9 watt rock lights on one channel, a pair of 27 watt front windshield led's.
It will either supply 12 volts or ground, depending on whether you supply the relay input (common) with 12 volts or ground.
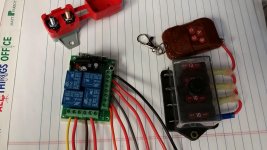
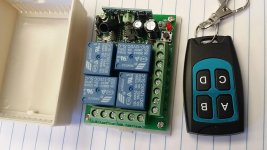
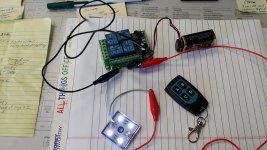
Here's what you get (or similar remote)
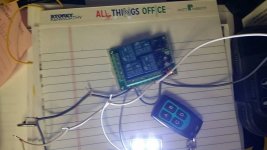
here's one channel hooked up to an LED with the relay panel running off a 9 volt battery
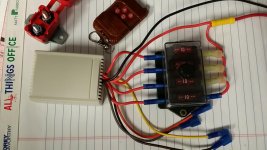
Here's a rough sketch of how you would hook it up (this only applies to the $15 pod- see page 4 for $10 pod)-
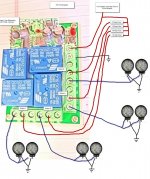
I would recommend getting a 30 amp circuit breaker, a 4 position fuse panel from waytekwire.com and picking up (4) 10 amp ATC fuses from auto parts store.
Part # 46080 Fuse Panel $5.48
Part # 46331 Circuit Breaker $2.26 (you have to order min qty 3 amazon has them individually for $5
You will need some Female Insulated Quick Disconnects (31713 Blue Female Quick Disconnect terminals $8.49- qty 50- from waytekwire) or Car audio Shop- you will need 10.
Programming- before you hook it up - decide- do you want the buttons to turn the accessories on/off (latching) or do you want the accessories to turn on only for the amount of time you press the button (momentary)
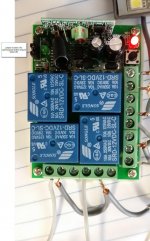
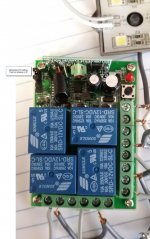
The power has to be off before changing the jumper, or else it won't actually change the memory of the board.
There is a pin switch in the upper left corner- you need to change what pins the jumper ties together to change the programming
For Latching style controls- (this is probably the one you want)- (this only applies to the $15 pod)
For Momentary-
Next- press and release the memory button (upper right hand corner of board) Light will turn on, then press a button on the remote. Light on board will flash several times, the remote is now paired to the board.
If ever you need to reset the board, hold the memory button for 5 seconds, the light will flash a few times. Board memory is now reset.
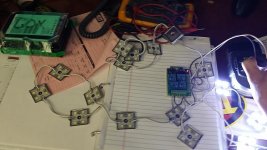
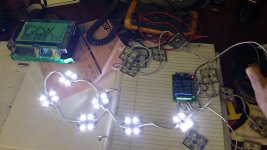
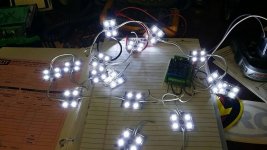
Here is mine wired up to 4 different sets of LED's in latching mode, with all 4 channels on at once-
Disclaimer- Apparently the $10 devices all use the same wireless frequency . So I would highly suggest having a power switch or a disconnect, so you could disable the wireless functions when you don't need them.
Kind of like finding out a neighbor has his garage door opener set to the same frequency as you
The $15 devices might also all use the same frequency (don't have 2 to test) but the $15 device is on a different frequency than the $10 device
Yes there could be. Would be as reliable as having actual switches and relays, no. but hey, its only 10 bucks.
10 Amps max per channel, 4 channels total.
http://www.ebay.com/itm/New-12v-4-C...ntrol-Receiver-Momentary-Switch-/160957051029- this one has a cheaper looking remote
http://www.ebay.com/itm/12V-4-Chann...ion_Controls_Touchscreens&hash=item2586fd04fb - this is one in my first pics- $15 + $6 shipping
It could run 120 watts of lights per channel. ie- a set of 12- 9 watt rock lights on one channel, a pair of 27 watt front windshield led's.
It will either supply 12 volts or ground, depending on whether you supply the relay input (common) with 12 volts or ground.
Here's what you get (or similar remote)

here's one channel hooked up to an LED with the relay panel running off a 9 volt battery

Here's a rough sketch of how you would hook it up (this only applies to the $15 pod- see page 4 for $10 pod)-

I would recommend getting a 30 amp circuit breaker, a 4 position fuse panel from waytekwire.com and picking up (4) 10 amp ATC fuses from auto parts store.
Part # 46080 Fuse Panel $5.48
Part # 46331 Circuit Breaker $2.26 (you have to order min qty 3
You will need some Female Insulated Quick Disconnects (31713 Blue Female Quick Disconnect terminals $8.49- qty 50- from waytekwire) or Car audio Shop- you will need 10.
Programming- before you hook it up - decide- do you want the buttons to turn the accessories on/off (latching) or do you want the accessories to turn on only for the amount of time you press the button (momentary)
The power has to be off before changing the jumper, or else it won't actually change the memory of the board.
There is a pin switch in the upper left corner- you need to change what pins the jumper ties together to change the programming
For Latching style controls- (this is probably the one you want)- (this only applies to the $15 pod)

For Momentary-

Next- press and release the memory button (upper right hand corner of board) Light will turn on, then press a button on the remote. Light on board will flash several times, the remote is now paired to the board.
If ever you need to reset the board, hold the memory button for 5 seconds, the light will flash a few times. Board memory is now reset.
Here is mine wired up to 4 different sets of LED's in latching mode, with all 4 channels on at once-

Disclaimer- Apparently the $10 devices all use the same wireless frequency
Kind of like finding out a neighbor has his garage door opener set to the same frequency as you
The $15 devices might also all use the same frequency (don't have 2 to test) but the $15 device is on a different frequency than the $10 device
Last edited:

