If you've just installed a suspension lift and a set of bigger tires on your Jeep JK Wrangler and are still getting a bit of fender rub at a full flex, one of the easiest ways to address it is to install a 1" body lift. While a body lift won't improve your JK's ability to perform on the trail, it will give your larger tires just a bit more breathing room under a set of factory fenders and, at a low cost of about $100, it can be done for cheap. Installation of a body lift is very easy, can be done by yourself with basic tools and in just about an hour. This write-up will show you what you'll need and how to do it.
NOTE: The following installation write-up was done on a 2007 Jeep JK Wrangler Unlimited. If you have a 2008 JK and/or a 2-Door JK, the procedure you will have to follow may differ just slightly. Also, if you have a manual transmission, some minor trimming of the rubber inner shift boot will be necessary or, you will need to install some kind of shifter relocator.
What You Will Need
• M.O.R.E. 1″ JK Body Lift
• 16, 18mm Sockets
• Ratchet
• Torque Wrench
• Phillips Screwdriver
• Flathead Screwdriver
• Pry Bar
• Hammer
• Bench Vice
• 2×4 Wood
• Loc-Tite
What You Will Get
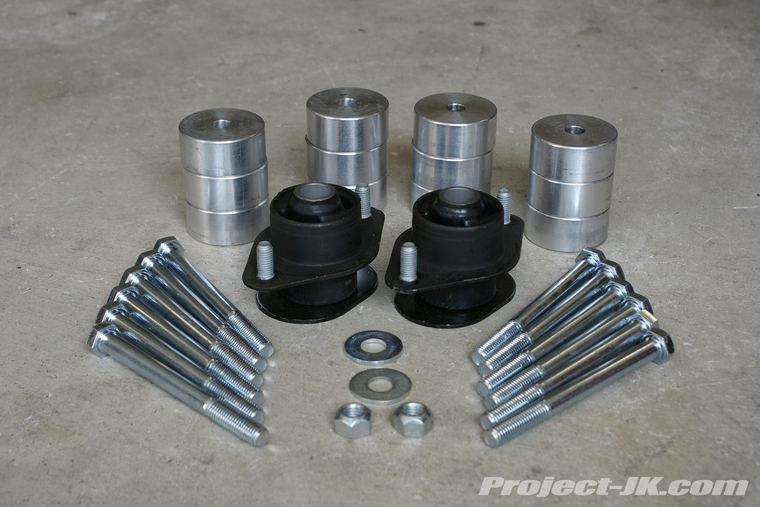
(12) Aluminum Pucks
(12) 12-1.75×130mm Bolts
(2) 12-1.75mm Lock Nuts
(2) 1/2″ Flat Washers
(2) OEM Body Mounts
Instructions
Here’s a pic of all parts you will get with your new M.O.R.E 1″ Jeep JK Wrangler Unlimited body lift. Please verify what you have with this pic and parts list to the left before proceeding.
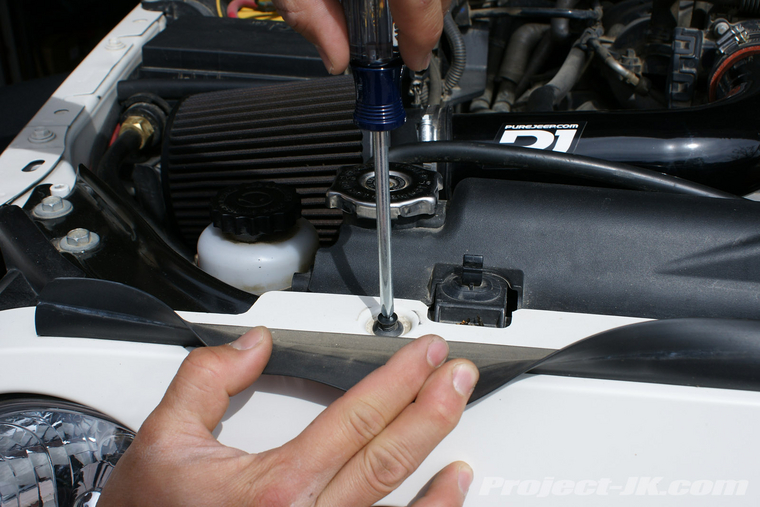
1. Park on level ground, open your hood and then using a phillips screwdriver, loosen the plastic retaining screws securing the top of the front clip in place.
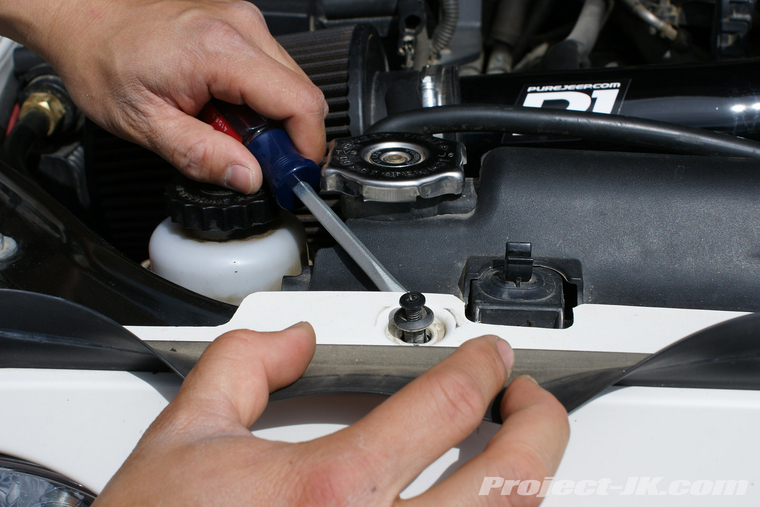
2. Unfortunately, you may find that a majority of these plastic screws simply turn in place. If this is the case, use a flathead screwdriver to help pry them up and out of their holes as shown in this pic.
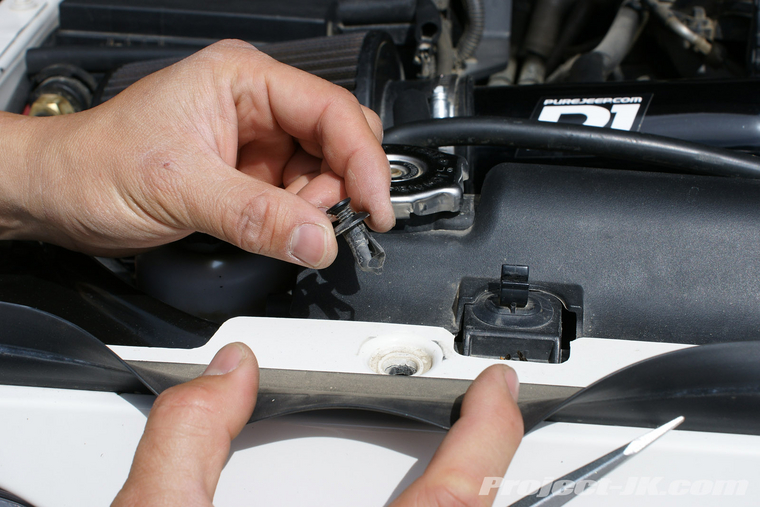
3. Once loose, the entire plastic screw and expansion sleeve should pull up and out of their mounting holes.
4. Carefully pull the front clip forward to separate the lower trim tabs from their mounting slots.
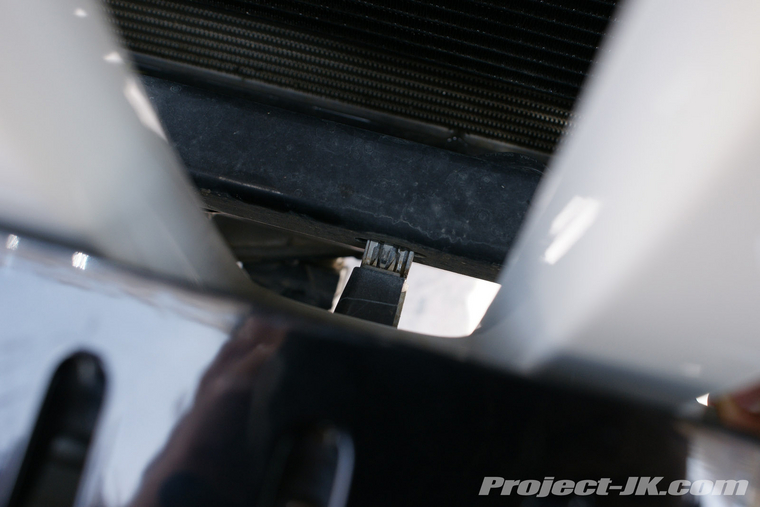
5. Lean the front clip forward a bit to gain access to the indicator lights. Then, take the wiring harness plug and pull the red locking tab back.
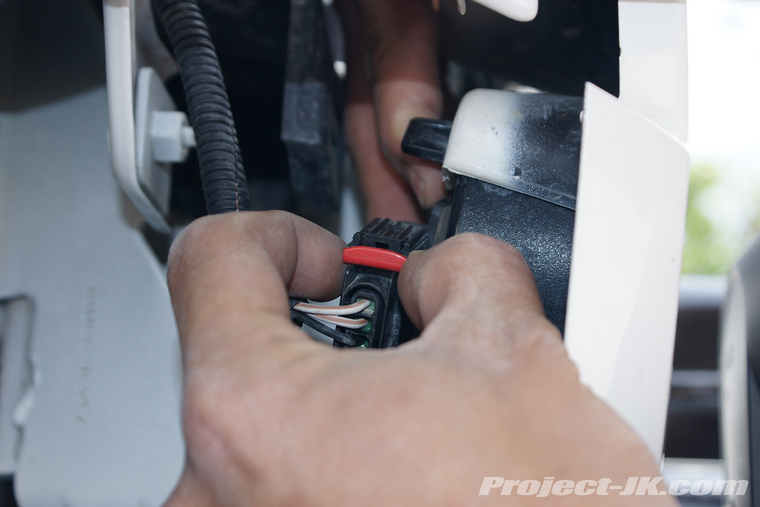
6. Squeeze the wiring harness plug and pull it out of the indicator light socket.
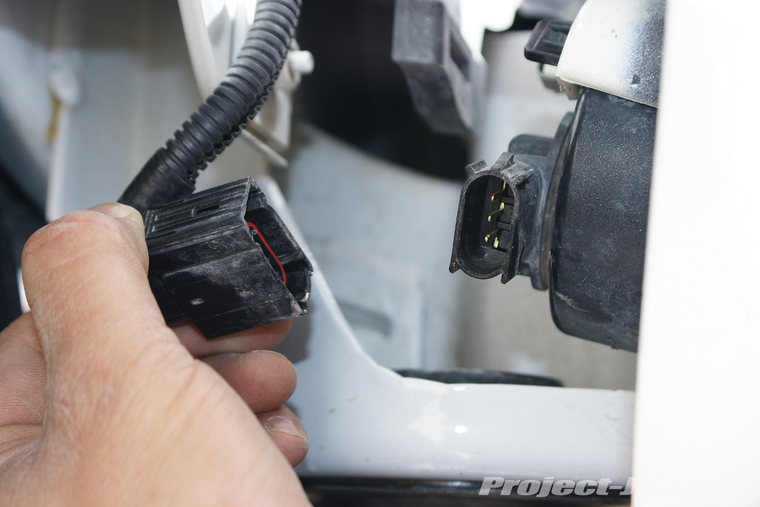
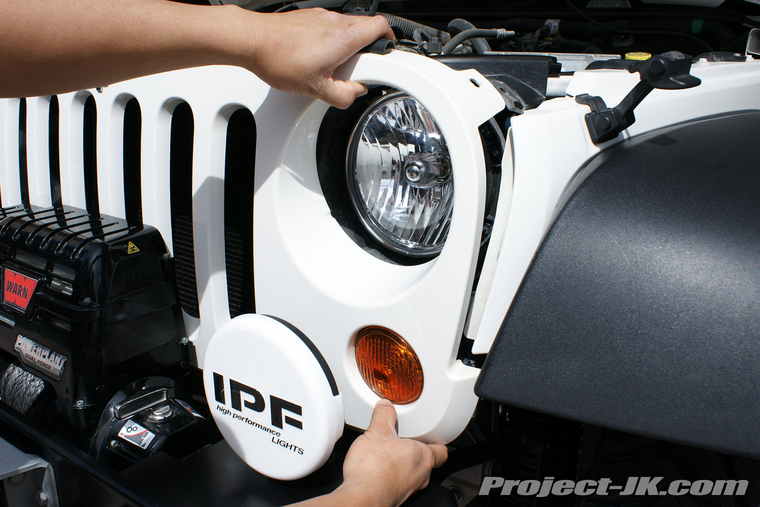
7. Pull the front clip completely off and set it someplace where it won’t get damaged.
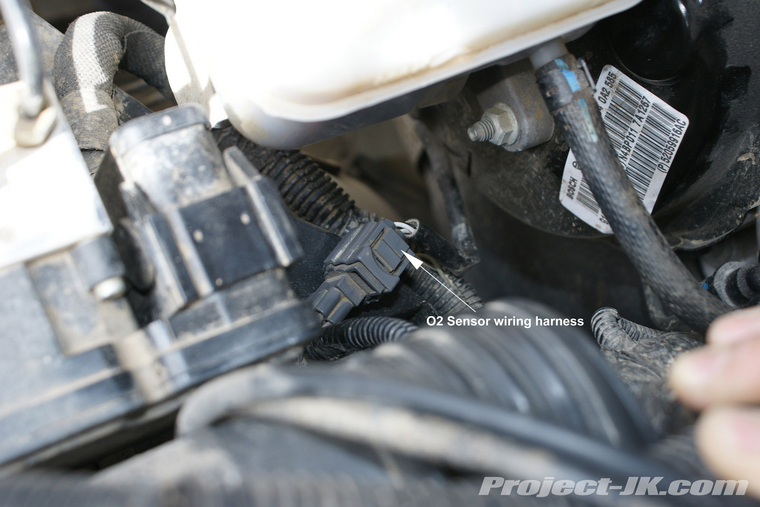
8. Go to the driver side of and find your O2 sensor wiring harness which is located below the brake master cylinder as shown in this pic.
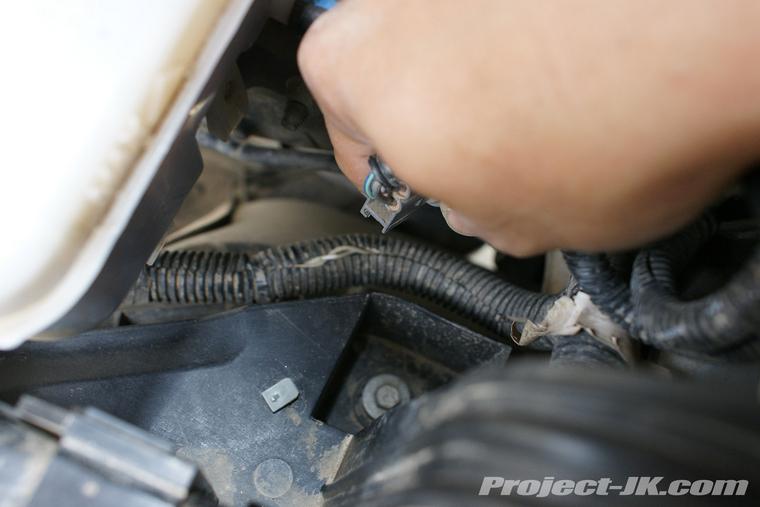
9. Slide the wiring harness plug off the mounting tab as shown in this pic. This is done to provide enough slack for the wiring harness after the body of your Jeep is lifted 1″.
10. Using an 18mm socket, loosen but do not remove the forward most body mount nut on the driver side of your Jeep.
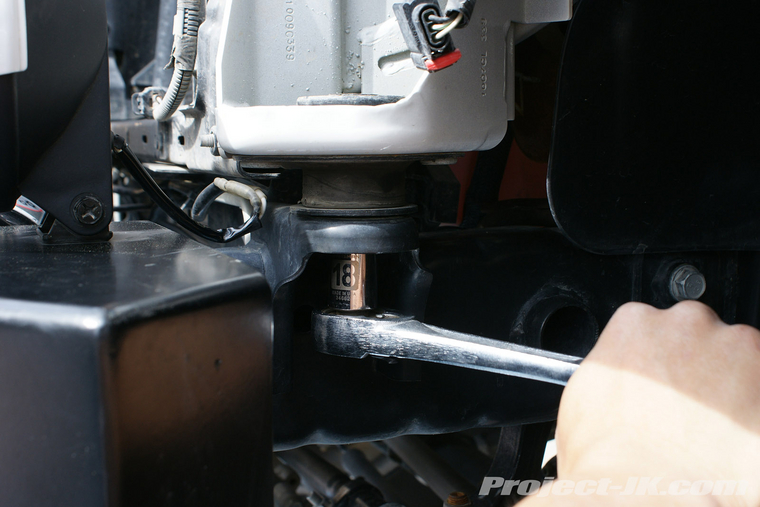
11. Using an 18mm socket, loosen but do not remove the 3 body mount bolts along the driver side frame rail as shown.
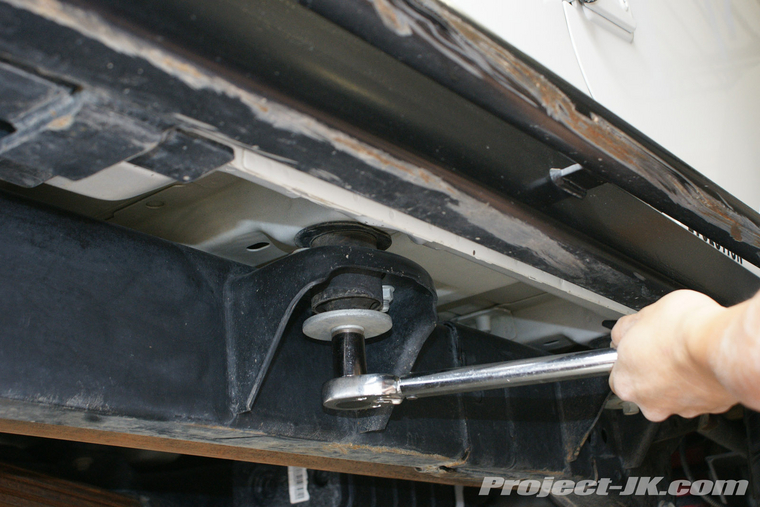
12. Moving towards the rear of your Jeep, use an 18mm socket to loosen but do not remove the body mount bolt located on the 2nd to the last cross member between the driver side rear shock and coil as shown in this pic.
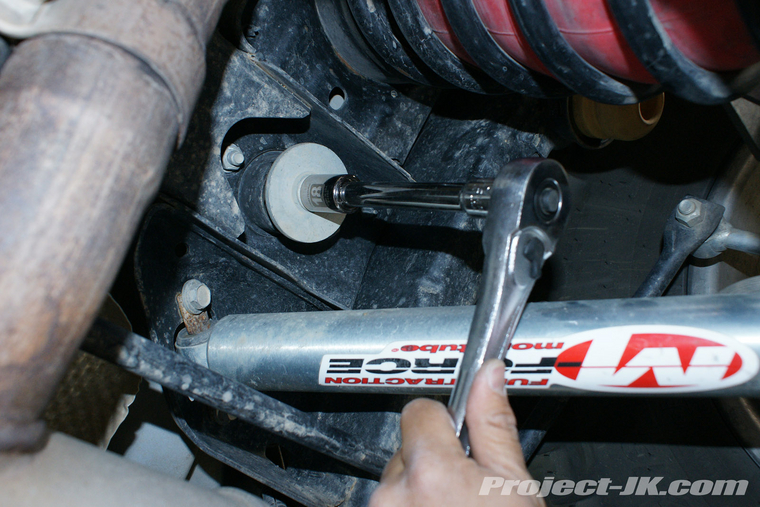
13. Use an 18mm socket to loosen but do not remove the last body mount bolt on the driver side which is located on the rear corner of next to the muffler as shown in this pic.
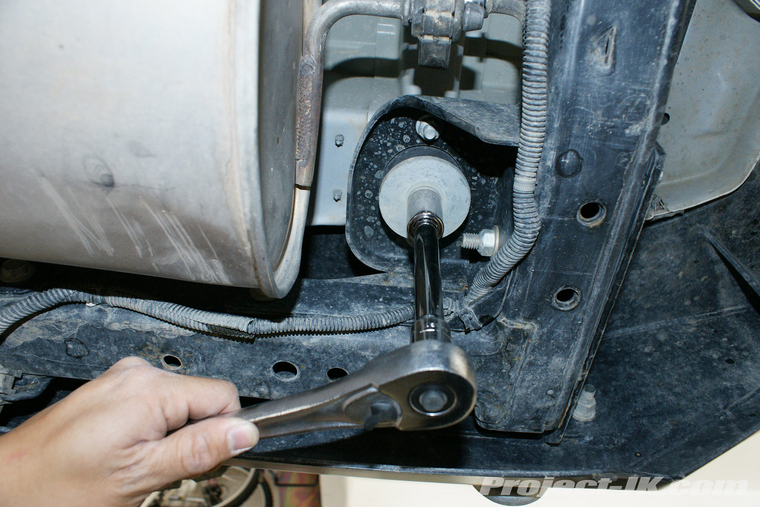
14. Repeat steps #10 through #13 on the passenger side.
15. Back on the driver side again, use a 16mm socket to remove the 2 nuts securing the forward most body mount to the body.
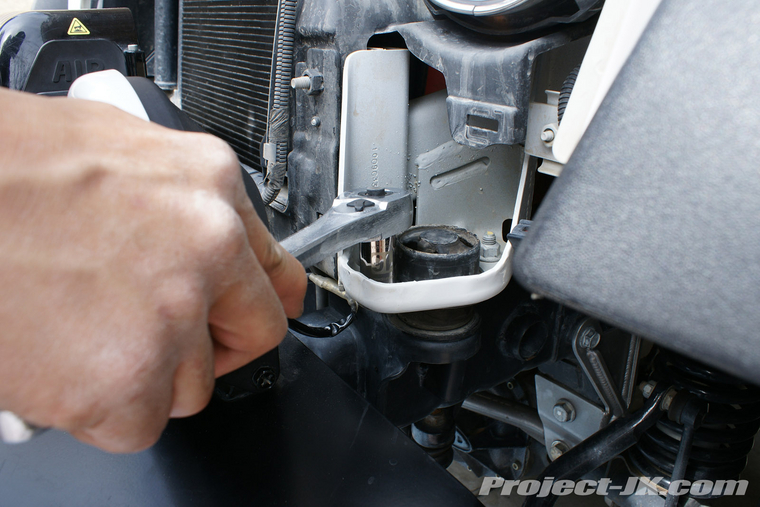
16. Remove the nut and washer securing the forward most body mount to the frame.
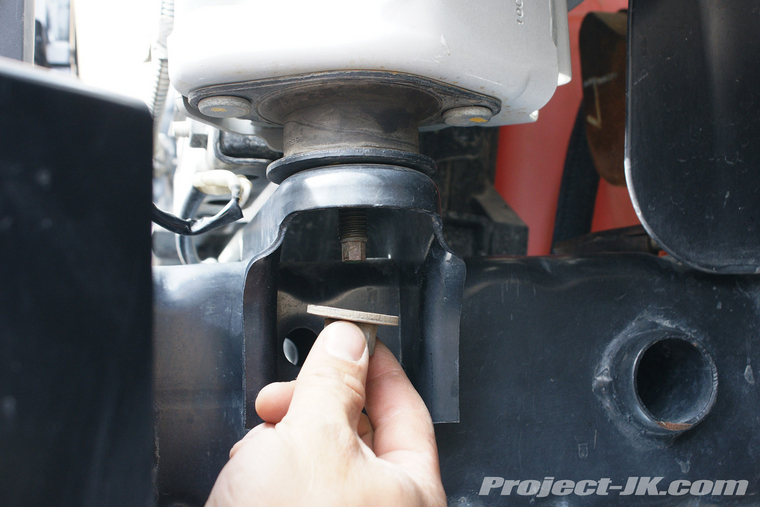
17. One by one, loosen the other 5 body mount bolts along the driver side frame rail to the point were they are just dangling in place. Then, using a pry bar, separate the bolt and washer from the body mount as shown in this pic.
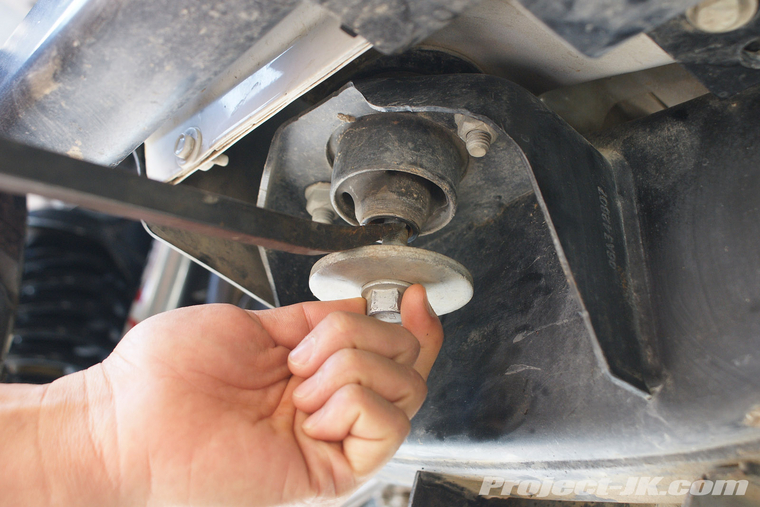
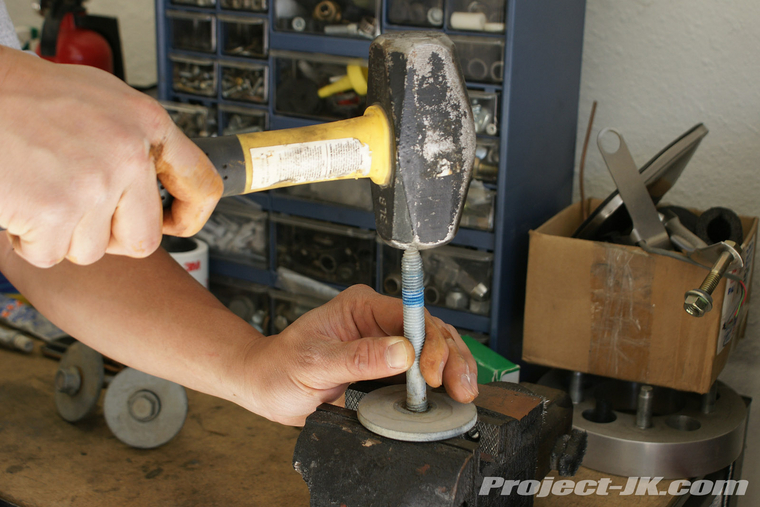
18. Take all 5 driver side body mount bolts and separate the washers from them by placing them in partially open bench vice and striking the bolt with a hammer as shown in this pic.
19. Stack cut lengths of 2×4 on top of a floor jack, position them under the body and just behind the pinch seam.
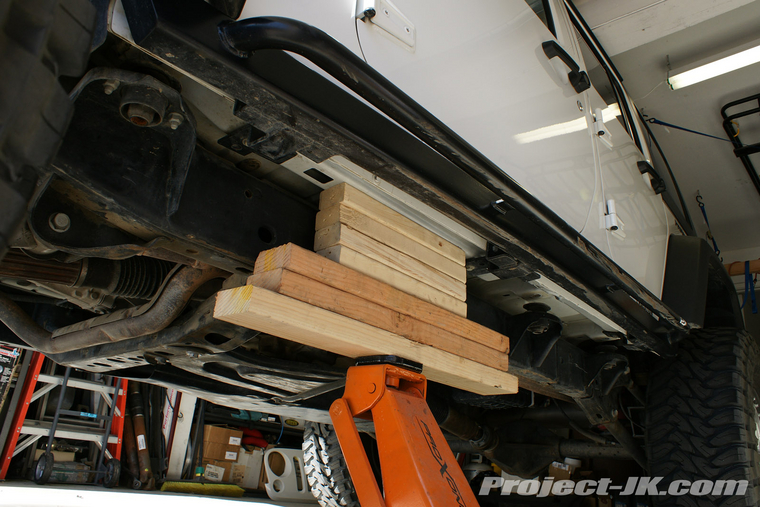
20. Slowly lift the body of your Jeep up off the driver side frame rail and go just high enough where you can remove the forward most body mount and be able to slip in a 1″ puck between the body and all the other body mounts.
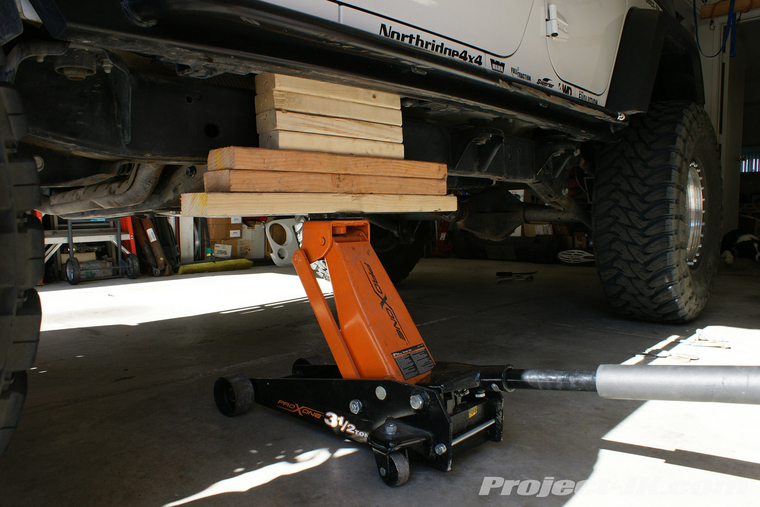
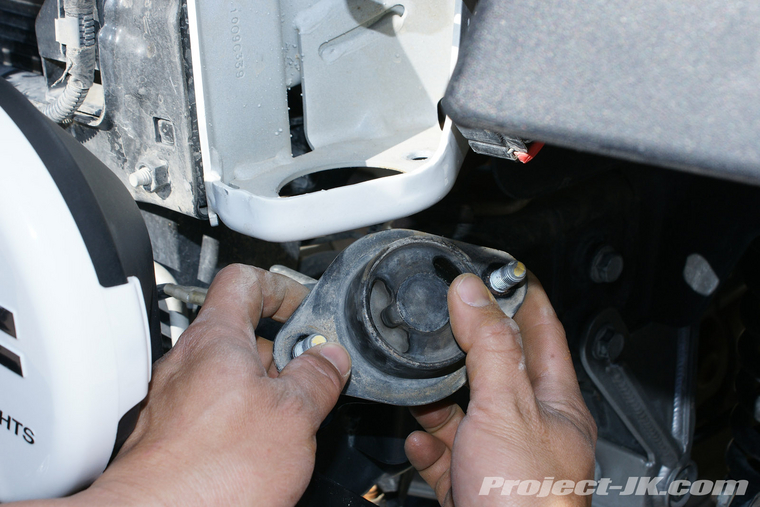
21. With the body of your Jeep raised up a bit, you should be able to remove the forward most body mount on the driver side with ease.
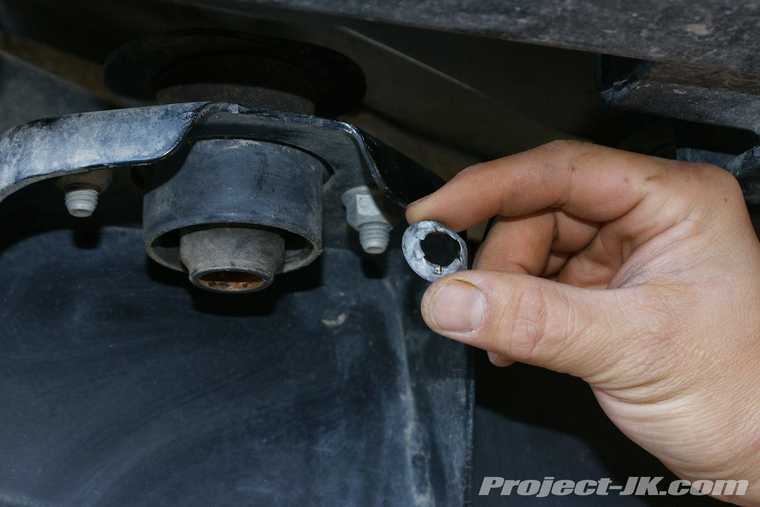
22. Now that there is a gap created from the lifting of your Jeep's body, reach up on top of the other 5 body mounts and remove the thin retaining washers that were previously preventing your body mount bolts from being removed.
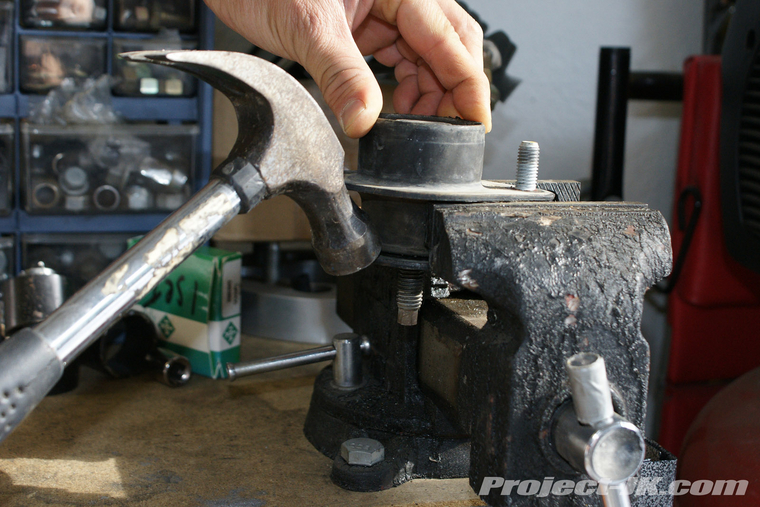
23. Take the body mount that you just removed, place it in a bench vice and knock off the large washer attached to the end of it with a hammer as shown in this pic.
24. Install one of the new OEM body mounts provided with the M.O.R.E. 1″ body lift up into the forward most position.
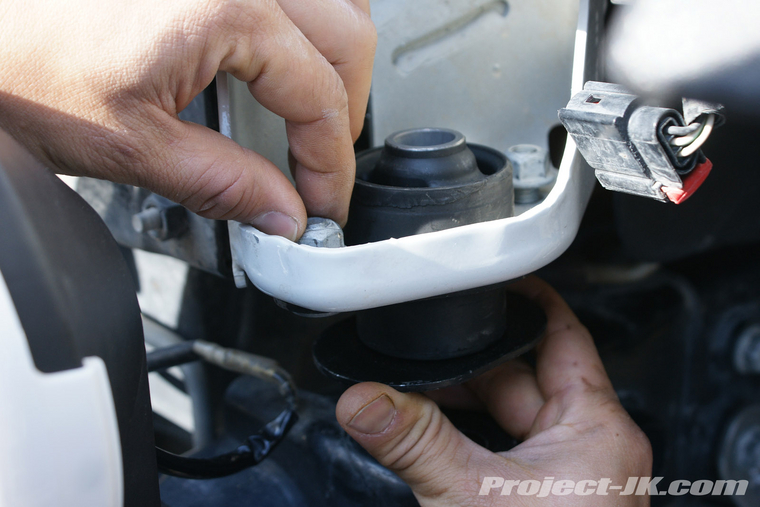
25. Using a 16mm socket, secure the new body mount in place using the factory nuts. Tighten these nuts to 40 ft. lbs. of toque.
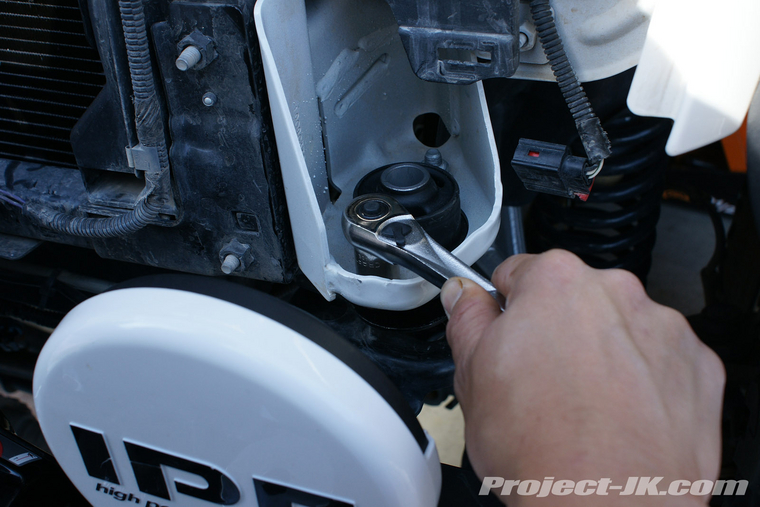
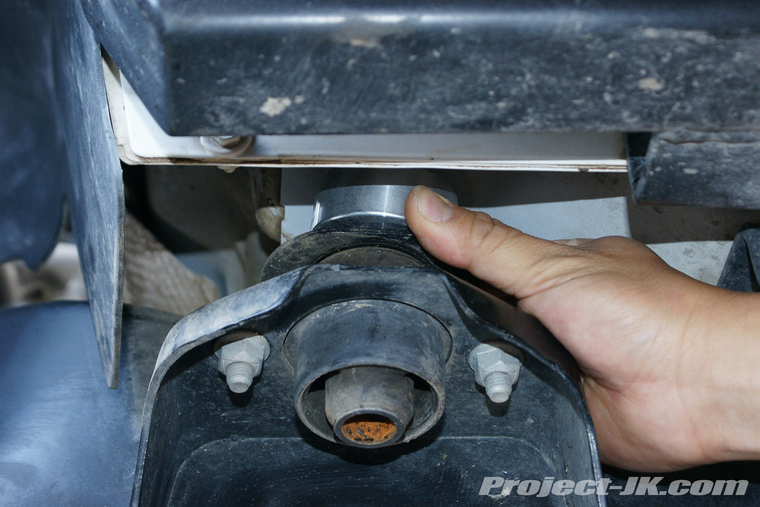
26. Insert one of the 1″ pucks in between the OEM body mount and frame as shown in this pic.
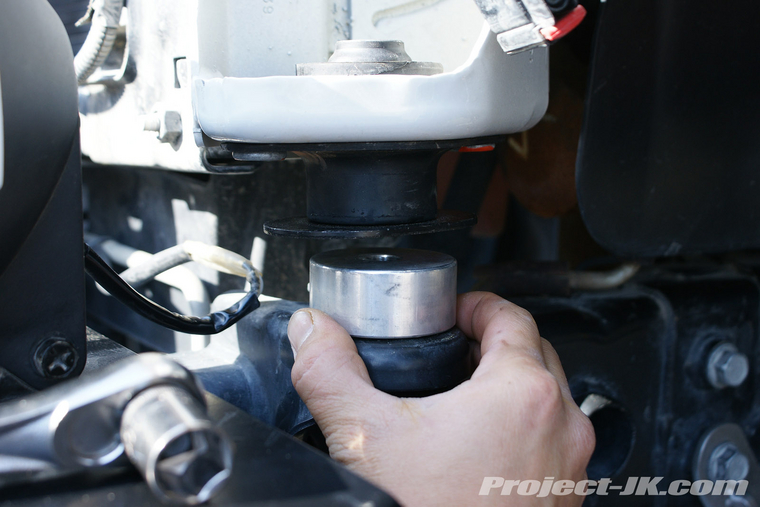
27. Take one of the new 12-1.75×130mm bolts provided with the kit and then slide one of the 1/2″ flat washers onto it as shown.
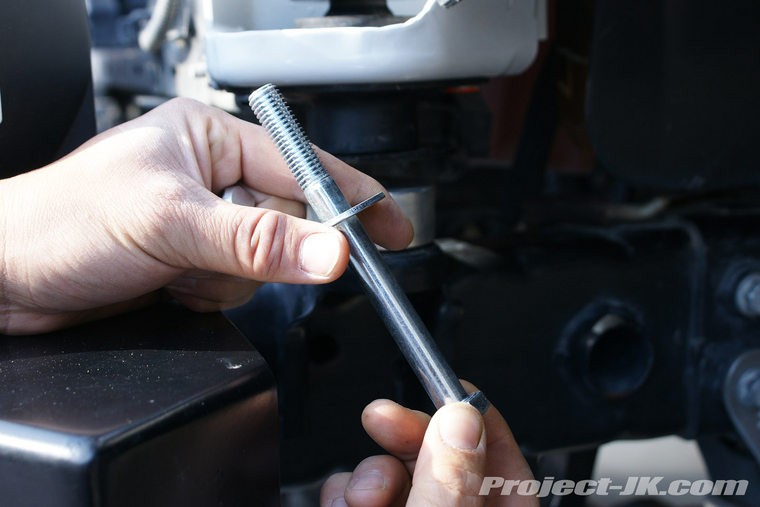
28. Insert the bolt and washer you just assembled up through the frame, the M.O.R.E. aluminum puck, and OEM body mount. Then, take the factory washer you removed back in step #23, place it on top of the body mount and secure everything in place using the supplied locknut. Leave the bolt and nut finger tight for now.
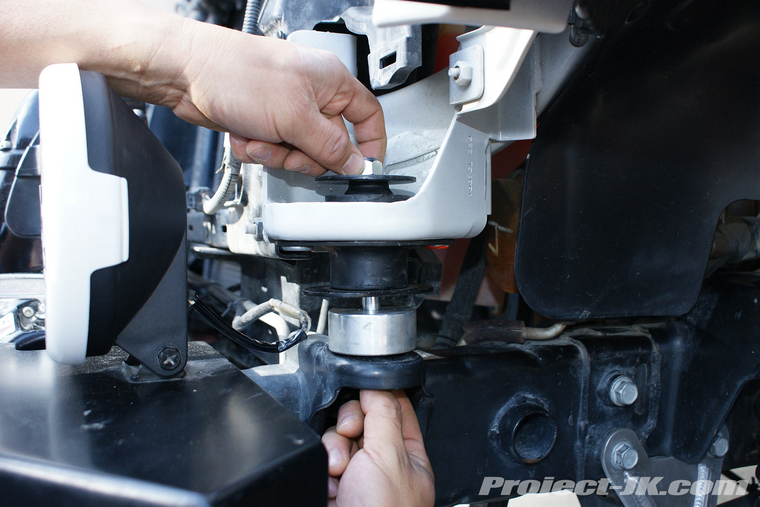
29. Insert a 1″ puck on top of each of the 3 OEM body mounts situated along the driver side frame rail.
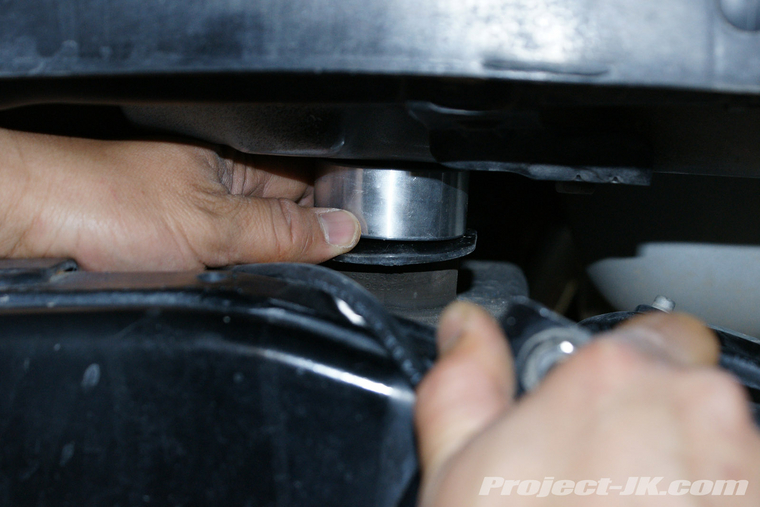
30. Insert a 1″ puck on top of the body mount located on the 2nd to the last cross member between the driver side rear shock and coil as shown in this pic.
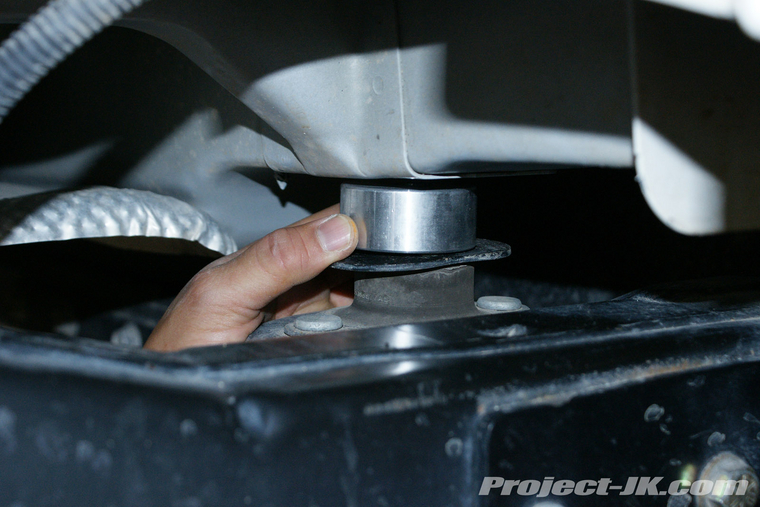
31. Finally, Insert a 1″ puck on top of the body mount located on the driver side rear most corner.
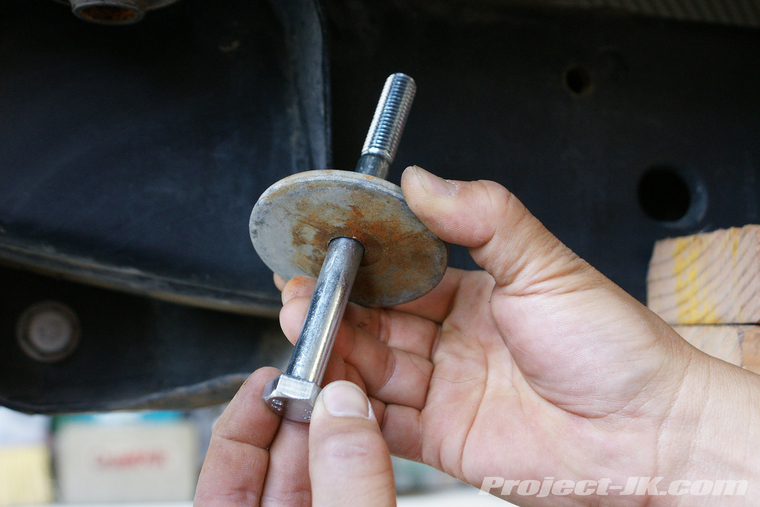
32. Take the remaining 12-1.75×130mm bolts provided with the kit and slide the large factory washers (previously removed back in step #18) on to them as shown in this pic.
33. One by one, apply some Loc-Tite on to the threads of your new 1″ body lift bolts provided with the kit.
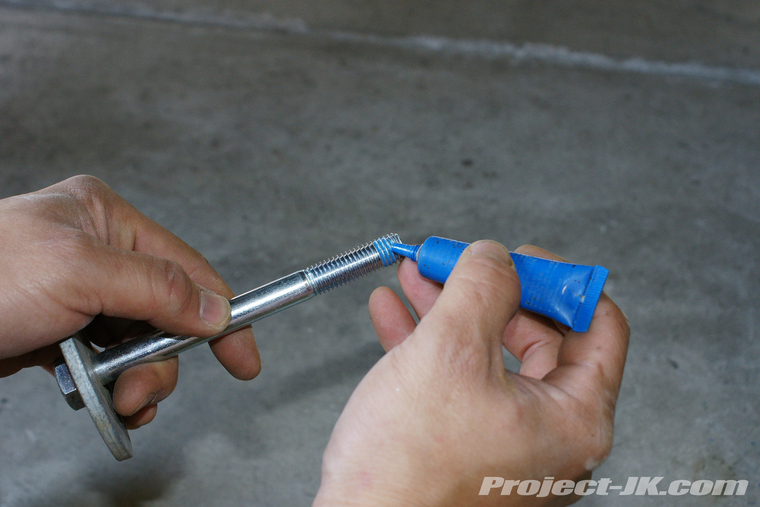
34. Install all the new bolts up through the factory body mounts and 1″ pucks and then secure then finger tight to the body as shown in this pic.
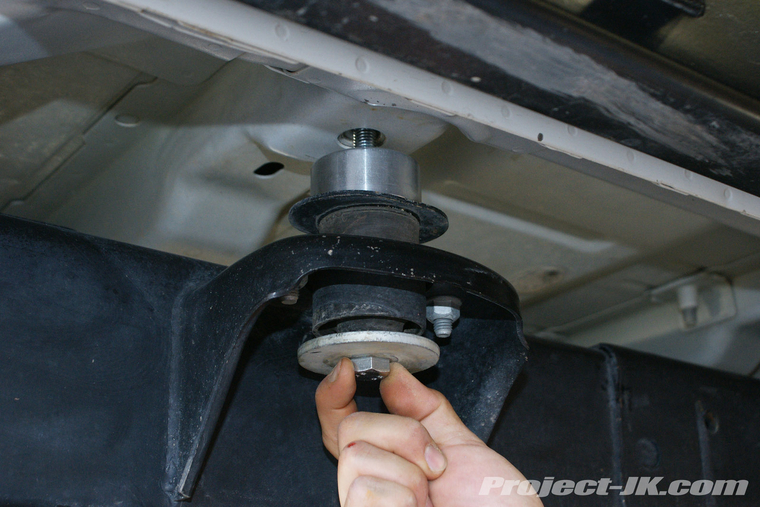
35. Lower your floor jack so that the body of your Jeep is sitting on top of the 1″ pucks. Repeat steps #10 through #35 and then, using a 19mm socket and wrench, tighten all the body mount bolts to 80 ft. lbs. of torque.
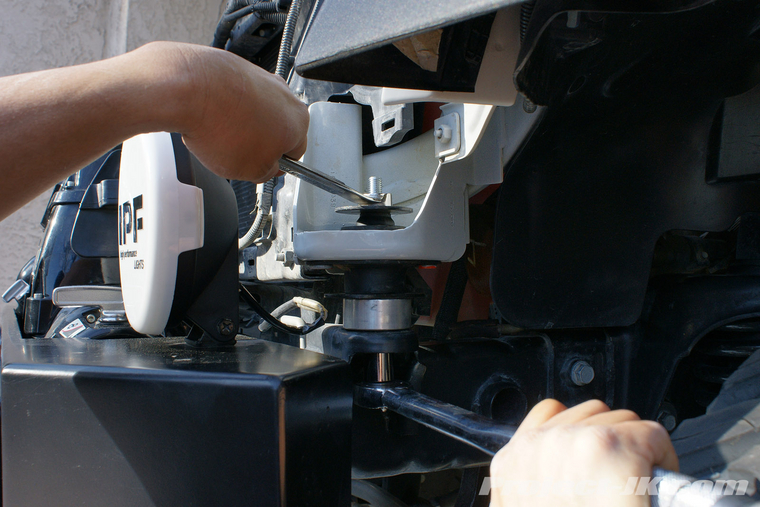
36. Hold your front clip up to the front of your Jeep and then reconnect the wiring harness for your indicator lights and lock them into place by sliding the red tab in.

37. Secure the bottom of your front clip to the front of your Jeep by pushing the trim tabs in place.

38. Using a phillips screwdriver, secure the top of the front clip your Jeep by inserting and screwing in the plastic retaining screws.

6-Speed Manual Transmission: If your Jeep JK Wrangler came equipped with a 6-speed manual transmission, you will need to do some minor trimming of the inner shift boot or install a shifter adapter like the kind that Rough Country makes (I highly recommend this route). Failure to do so will make shifting into 2nd, 4th, 6th and Reverse quite difficult.
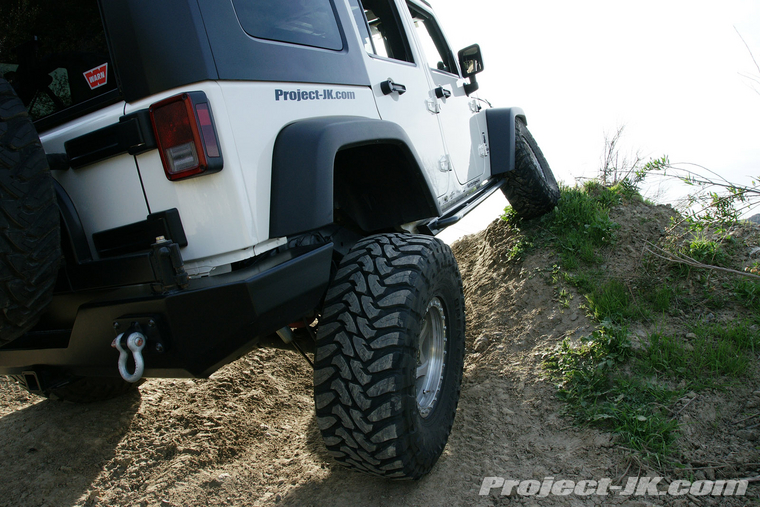
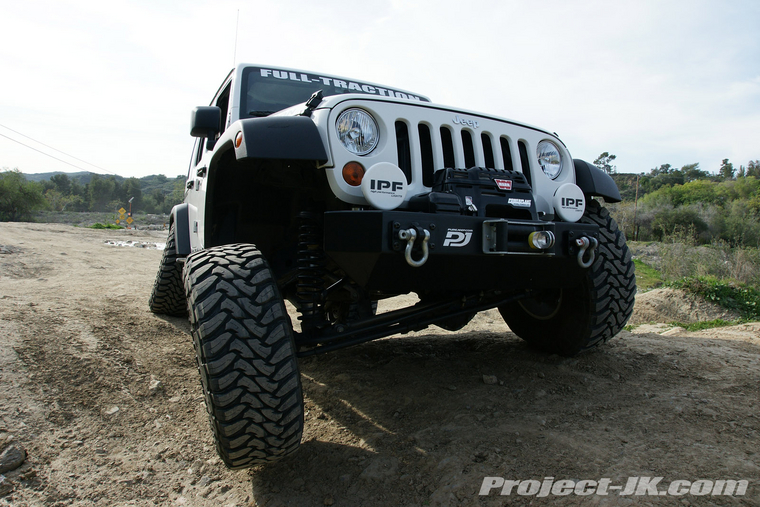
That's it, you're done. Here are a couple of shots that show the gap you will have between the body of your Jeep and the bumper. As you can see, it really isn't too bad.
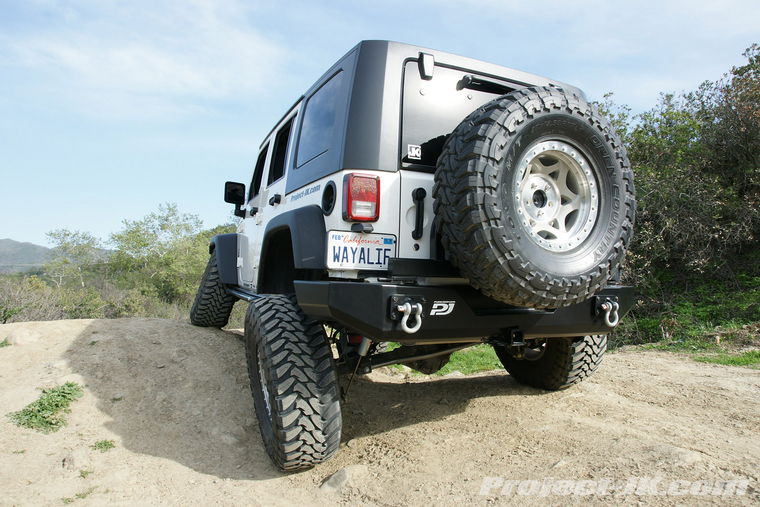
Up front, you can't hardly tell at all that you have a body lift installed.
NOTE: The following installation write-up was done on a 2007 Jeep JK Wrangler Unlimited. If you have a 2008 JK and/or a 2-Door JK, the procedure you will have to follow may differ just slightly. Also, if you have a manual transmission, some minor trimming of the rubber inner shift boot will be necessary or, you will need to install some kind of shifter relocator.
What You Will Need
• M.O.R.E. 1″ JK Body Lift
• 16, 18mm Sockets
• Ratchet
• Torque Wrench
• Phillips Screwdriver
• Flathead Screwdriver
• Pry Bar
• Hammer
• Bench Vice
• 2×4 Wood
• Loc-Tite
What You Will Get
(12) Aluminum Pucks
(12) 12-1.75×130mm Bolts
(2) 12-1.75mm Lock Nuts
(2) 1/2″ Flat Washers
(2) OEM Body Mounts
Instructions
Here’s a pic of all parts you will get with your new M.O.R.E 1″ Jeep JK Wrangler Unlimited body lift. Please verify what you have with this pic and parts list to the left before proceeding.
1. Park on level ground, open your hood and then using a phillips screwdriver, loosen the plastic retaining screws securing the top of the front clip in place.
2. Unfortunately, you may find that a majority of these plastic screws simply turn in place. If this is the case, use a flathead screwdriver to help pry them up and out of their holes as shown in this pic.
3. Once loose, the entire plastic screw and expansion sleeve should pull up and out of their mounting holes.
4. Carefully pull the front clip forward to separate the lower trim tabs from their mounting slots.
5. Lean the front clip forward a bit to gain access to the indicator lights. Then, take the wiring harness plug and pull the red locking tab back.
6. Squeeze the wiring harness plug and pull it out of the indicator light socket.
7. Pull the front clip completely off and set it someplace where it won’t get damaged.
8. Go to the driver side of and find your O2 sensor wiring harness which is located below the brake master cylinder as shown in this pic.
9. Slide the wiring harness plug off the mounting tab as shown in this pic. This is done to provide enough slack for the wiring harness after the body of your Jeep is lifted 1″.
10. Using an 18mm socket, loosen but do not remove the forward most body mount nut on the driver side of your Jeep.
11. Using an 18mm socket, loosen but do not remove the 3 body mount bolts along the driver side frame rail as shown.
12. Moving towards the rear of your Jeep, use an 18mm socket to loosen but do not remove the body mount bolt located on the 2nd to the last cross member between the driver side rear shock and coil as shown in this pic.
13. Use an 18mm socket to loosen but do not remove the last body mount bolt on the driver side which is located on the rear corner of next to the muffler as shown in this pic.
14. Repeat steps #10 through #13 on the passenger side.
15. Back on the driver side again, use a 16mm socket to remove the 2 nuts securing the forward most body mount to the body.
16. Remove the nut and washer securing the forward most body mount to the frame.
17. One by one, loosen the other 5 body mount bolts along the driver side frame rail to the point were they are just dangling in place. Then, using a pry bar, separate the bolt and washer from the body mount as shown in this pic.
18. Take all 5 driver side body mount bolts and separate the washers from them by placing them in partially open bench vice and striking the bolt with a hammer as shown in this pic.
19. Stack cut lengths of 2×4 on top of a floor jack, position them under the body and just behind the pinch seam.
20. Slowly lift the body of your Jeep up off the driver side frame rail and go just high enough where you can remove the forward most body mount and be able to slip in a 1″ puck between the body and all the other body mounts.
21. With the body of your Jeep raised up a bit, you should be able to remove the forward most body mount on the driver side with ease.
22. Now that there is a gap created from the lifting of your Jeep's body, reach up on top of the other 5 body mounts and remove the thin retaining washers that were previously preventing your body mount bolts from being removed.
23. Take the body mount that you just removed, place it in a bench vice and knock off the large washer attached to the end of it with a hammer as shown in this pic.
24. Install one of the new OEM body mounts provided with the M.O.R.E. 1″ body lift up into the forward most position.
25. Using a 16mm socket, secure the new body mount in place using the factory nuts. Tighten these nuts to 40 ft. lbs. of toque.
26. Insert one of the 1″ pucks in between the OEM body mount and frame as shown in this pic.
27. Take one of the new 12-1.75×130mm bolts provided with the kit and then slide one of the 1/2″ flat washers onto it as shown.
28. Insert the bolt and washer you just assembled up through the frame, the M.O.R.E. aluminum puck, and OEM body mount. Then, take the factory washer you removed back in step #23, place it on top of the body mount and secure everything in place using the supplied locknut. Leave the bolt and nut finger tight for now.
29. Insert a 1″ puck on top of each of the 3 OEM body mounts situated along the driver side frame rail.
30. Insert a 1″ puck on top of the body mount located on the 2nd to the last cross member between the driver side rear shock and coil as shown in this pic.
31. Finally, Insert a 1″ puck on top of the body mount located on the driver side rear most corner.
32. Take the remaining 12-1.75×130mm bolts provided with the kit and slide the large factory washers (previously removed back in step #18) on to them as shown in this pic.
33. One by one, apply some Loc-Tite on to the threads of your new 1″ body lift bolts provided with the kit.
34. Install all the new bolts up through the factory body mounts and 1″ pucks and then secure then finger tight to the body as shown in this pic.
35. Lower your floor jack so that the body of your Jeep is sitting on top of the 1″ pucks. Repeat steps #10 through #35 and then, using a 19mm socket and wrench, tighten all the body mount bolts to 80 ft. lbs. of torque.
36. Hold your front clip up to the front of your Jeep and then reconnect the wiring harness for your indicator lights and lock them into place by sliding the red tab in.
37. Secure the bottom of your front clip to the front of your Jeep by pushing the trim tabs in place.
38. Using a phillips screwdriver, secure the top of the front clip your Jeep by inserting and screwing in the plastic retaining screws.
6-Speed Manual Transmission: If your Jeep JK Wrangler came equipped with a 6-speed manual transmission, you will need to do some minor trimming of the inner shift boot or install a shifter adapter like the kind that Rough Country makes (I highly recommend this route). Failure to do so will make shifting into 2nd, 4th, 6th and Reverse quite difficult.
That's it, you're done. Here are a couple of shots that show the gap you will have between the body of your Jeep and the bumper. As you can see, it really isn't too bad.
Up front, you can't hardly tell at all that you have a body lift installed.
